---
title: "Custom Module"
url: "https://developer.incode.com/dashboard-platform-administration/custom-module-dashboard/"
section: "dashboard-platform-administration"
group: "Add Modules"
version: "v1.1"
status: "live"
---
# Custom Module
The Custom Module pauses a Workflow and hands control to your application, which runs custom logic and returns a result that determines how the Workflow continues.
:::warning
The Custom Module requires an SDK integration to function. The steps on this page cover Dashboard configuration only: adding the module to a Workflow, referencing the callback function name from your SDK, and configuring Conditions to branch on the result. The callback that resumes the Workflow is implemented in your SDK code. See [SDK Reference](/sdk-reference/sdk-reference/) for those instructions.
:::
For an overview of this module and how it works, see [Custom Module](/features-and-modules/custom-module/).
## Supported with:
:white_check_mark: Workflows | :x: Flows
## Add Custom Module to Workflows
1. In the left menu, click **Flow Builder** > **Workflows**.
2. Click **New** or select an existing Workflow.
3. From the Modules list, drag and drop the **Custom Module** into the builder.
4. Click the three dots > **Edit** on the module node to open the [Configuration Options](#configuration-options) panel and adjust settings as needed.
## Configuration Options
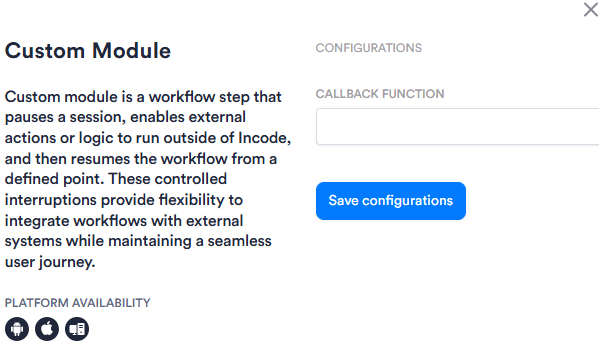
After making changes, click **Save configurations** to apply them.
| Setting | Description |
| ----------------------- | ------------------------------------------------------------------------------------------------------------------------------------------------------------------------------------------------------------------------------------------------------------------------------------------------------------------------------------------------------------------------ |
| **_Callback Function_** | The name of the callback function in your SDK integration that Incode invokes when the Workflow reaches this module. The value is a string and must exactly match the function name implemented in your SDK integration. Your callback must return `onSuccess`, `onFail`, or `onUnknown` to advance the Workflow. If no result is returned, the Workflow remains paused. |
## Add Conditions
[Conditions](/dashboard-platform-administration/configure-workflow-conditions/) let you branch the Workflow based on a result. Your SDK callback must return one of three results: `onSuccess`, `onFail`, or `onUnknown`. Your Workflow should define a distinct path for each. A common pattern is to route `onUnknown` to a step-up such as [ID Capture](/features-and-modules/id-capture/) or manual review, instead of treating it the same as `onFail`.
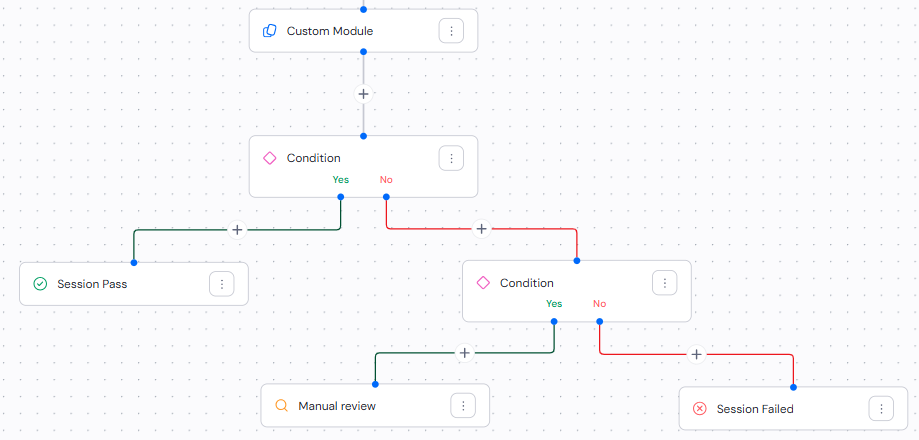
The steps below walk through one example configuration: two Conditions in sequence, with `onSuccess` routing to Session Pass, `onFail` routing to Session Failed, and `onUnknown` routing to Manual Review. This is one valid approach; you can structure the Conditions, result nodes, and step-up behavior differently to fit your use case.
### 1. Condition for `onSuccess`
The following steps detail the Condition configuration for the `onSuccess` path.
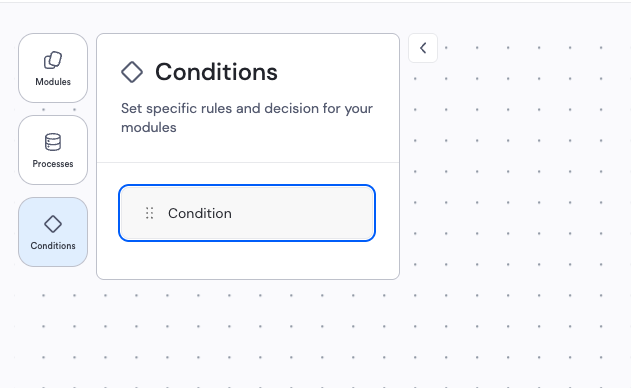
1. Drag a Condition into the builder from the left panel. Place it directly after the Custom Module node.
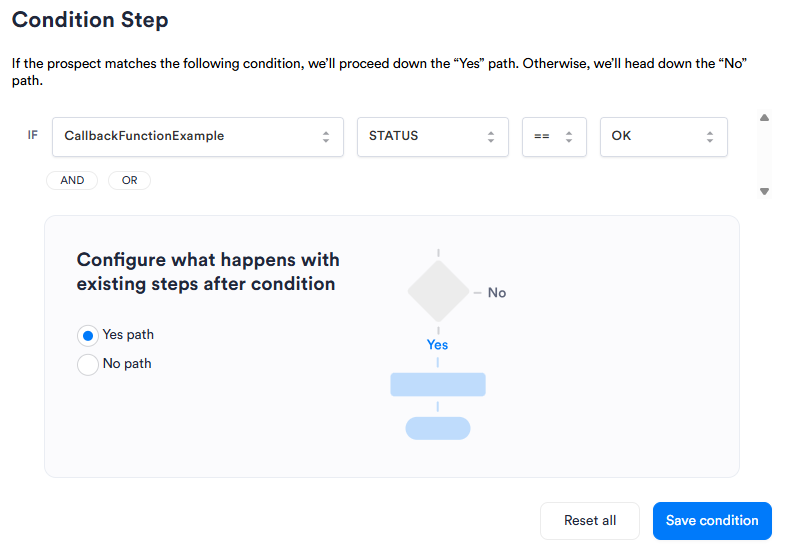
2. In the first drop-down, search for and select your **_Callback Function_** name.
3. In the second drop-down, select _Status_.
4. Keep the third drop-down set to _==_.
5. From the final drop-down, select _OK_. This corresponds to an `onSuccess` result.
6. Select the **Yes path** radio button. This routes the Workflow along the Yes path when the callback returns `onSuccess`.
7. Click **Save condition**.
### Example
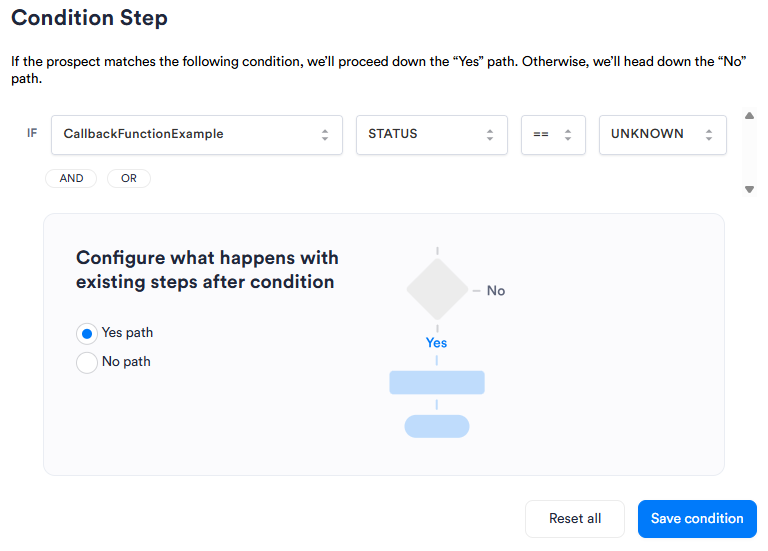
### 2. Condition for `onFail` and `onUnknown`
The following steps detail the Condition configuration for the `onFail` and `onUnknown` paths.
1. Drag a second Condition into the builder. Connect it to the **No** side of the first Condition, before the result node.
2. In the first drop-down, search for and select your **_Callback Function_** name.
3. In the second drop-down, select _Status_.
4. Keep the third drop-down set to _==_.
5. From the final drop-down, select _UNKNOWN_. This corresponds to an `onUnknown` result.
6. Select the **Yes path** radio button. This routes the Workflow along the Yes path when the callback returns `onUnknown`.
7. Click **Save condition**.
### Example
By default, both the Yes and No paths of the second Condition connect to a Session Failed result node. Update the Yes path result node to reflect your step-up flow:
1. Click the three dots on the result node connected to the **Yes path** of the second Condition.
2. From the **Select Decision** menu, select _Manual Review_.
3. Click **Update Decision**.
### Example
Following this configuration, your Workflow builder should look like this: