Scope: Hybrid Microsoft Entra environments only. A synced Entra directory must be linked to the AD integration.
Audience: Customer IT / Active Directory administrators.
Time to complete: ~30 minutes once prerequisites are in place.
This guide walks you through several related tasks, including setting up an Active Directory integration and creating the on-prem AD agent. This is a lightweight Windows service that lets Incode reset passwords and read password policy in your Active Directory without any inbound firewall rules. The agent opens a single outbound TLS 1.2+ channel to Incode and talks to your domain controller over LDAPS on port 636.
Agents are pooled per organization, so every agent host must be able to reach every domain controller in scope.
Prerequisites
Step 1: Set up an Entra user group
Roles needed in Entra for the group and app work: User Administrator, Groups Administrator, Application Administrator, and App Developer.
Create one Entra security group containing every employee who will use Incode. Its Object ID is what the Entra Directory Sync integration syncs from.
- In the Entra admin center, go to Groups > All groups > New group. Set the type to Security, name it (for example
Incode Users), and add the in-scope employees. - Open the group and copy its Object ID. You will paste it as the User Group ID in Step 2.
- Confirm each member's Entra profile is populated before syncing. Every user must have First name, Last name, and Email populated or they will not sync to Incode. Beyond those three, claims matching compares the verification result against the synced record, so missing attributes cause matching failures. Depending on your policy this can include user principal name, mobile phone, date of birth, and address.
Info
Security groups and Dynamic groups are supported. Nested groups are not supported. Incode syncs only the direct members of the group you specify, so if users belong to a group that is itself a member of the Incode group, they will not be synced. Add them directly or use a dynamic membership rule instead.
Step 2: Global Admin account for Entra Directory Sync
A Microsoft Entra Global Administrator must grant admin consent to the Incode app. If consent is rejected or the approver lacks rights, the integration stays incomplete and setup restarts from scratch. Full reference: Microsoft Entra Directory.
- In the Incode Dashboard, go to Integrations.
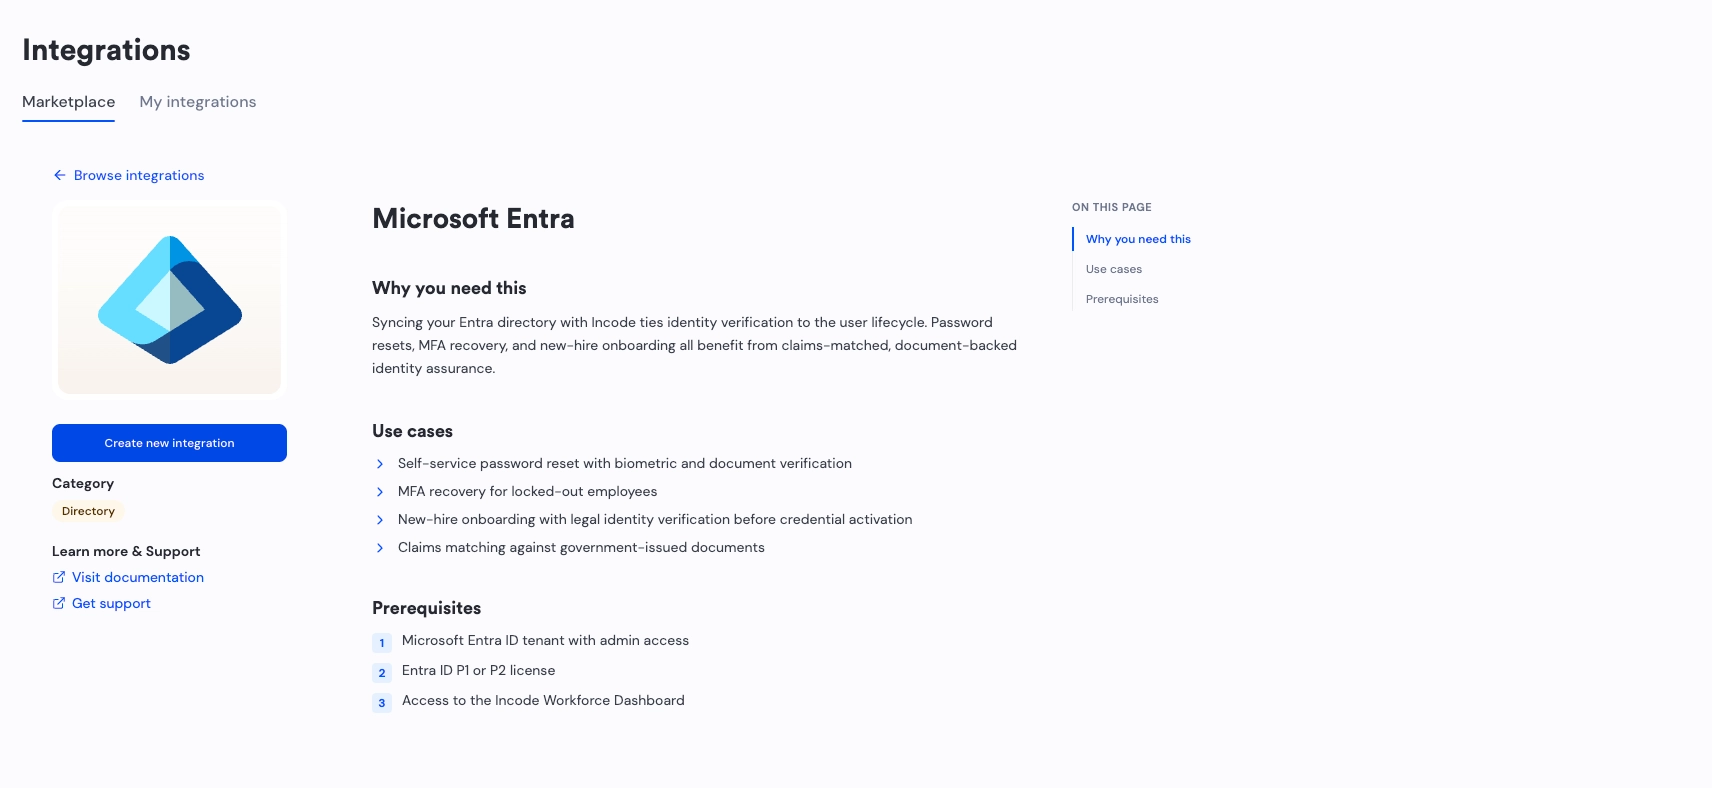
- In the Directory section, click to open Microsoft Entra, then click Create new integration.
- Enter a Directory name and the User Group ID (Object ID) from Step 1.
- Use the Permissions drop-down to select Read and write. Read-only allows sync but blocks Self-Serve password and MFA resets.
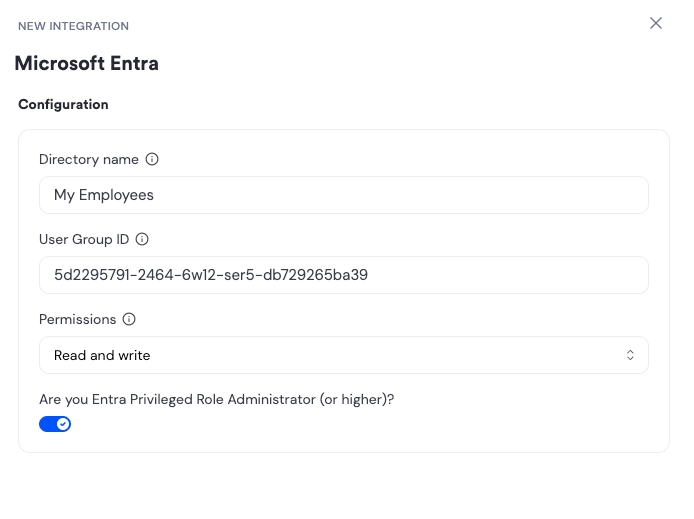
- Review the toggle. If you are not at least an Entra Privileged Role Administrator, click to turn the toggle off, then enter the Tenant ID.
- Click Save. Dashboard redirects to the Microsoft admin consent page; the Global Administrator approves the requested permissions.
- Go back to Integrations. Switch to the My integrations tab and find the Entra directory you just set up. Click the card's menu Open the Entra card's menu
 and click Sync Directory. Large directories take several minutes.
- In Dashboard's left menu, click Services > Directory Information to confirm users imported. Users marked not enrolled have synced but not yet completed an Incode verification session.
Step 3: Set up two VMs
Set up two Windows VMs inside your network to run the agent. You need two for production. Your organization's agents work as a pool, so requests get shared between both VMs. If one goes offline, the other keeps working and you don't have to change any settings.
| Requirement | Value |
|---|---|
| Count | 2 (minimum recommended for production) |
| OS | Windows (the agent is a Windows executable; Mac and Linux are not supported) |
| vCPU | 4 |
| RAM | 8 GB |
| Disk | 40 GB |
| Outbound access | HTTPS / WSS to the Incode endpoint, TLS 1.2+ |
| Directory access | LDAPS on port 636 to every domain controller in scope |
| Inbound rules | None. The agent opens no listening port |
Before installing anything, run the connectivity test from each VM to each domain controller:
Test-NetConnection -ComputerName dc01.corp.local -Port 636
A successful TCP connect means the agent will be able to bind. A timeout points to a firewall rule between the VM and the DC. If a DC only listens on plain 389, enable LDAPS first; there is no port or StartTLS option to change on the Incode side.
Step 4: Set up the service account
Create a dedicated AD service account (for example svc_incode) for the agent to bind with. Do not reuse an administrator account or a person's account. The integration performs only two directory operations, so grant only these rights:
| Operation | Rights needed |
|---|---|
| Read the password policy | Read access to the base DN, enough to read the domain password policy attributes |
| Reset a user's password | Reset Password permission, delegated only on the OUs containing in-scope users |
- In Active Directory Users and Computers, create the account in a Service Accounts OU and set a strong password.
- Delegate Reset Password on the target user OUs via the Delegation of Control wizard rather than at the domain root.
- Open the account's Attribute Editor and copy its
distinguishedName(for exampleCN=svc_incode,OU=Service Accounts,DC=corp,DC=local). The integration form needs this full DN, not the username. - Confirm the Base DN for the directory (for example
DC=corp,DC=local), set to the narrowest DN that still contains every object in scope. - If the account has a password expiry policy, schedule a rotation and document who resets it if it locks out. An expired password breaks every workflow on the integration.
Note
Password resets require at least one agent. Continue to the next section for instructions.
Set up the AD agent
The integration won't turn on until at least one agent is connected. Register each agent in Dashboard first, then install the binary on its VM. Do the same on the second VM.
Step 1: Create the agent in Dashboard
- In the Incode Dashboard, go to Configuration > AD Agents.
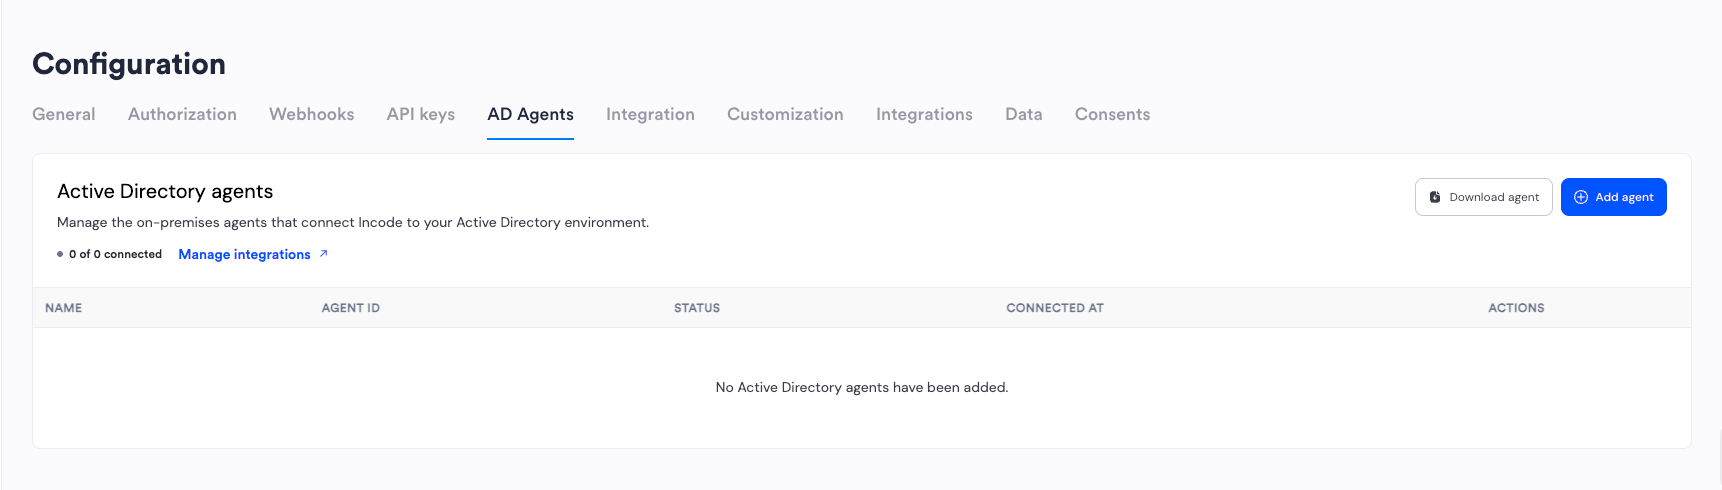
- Click Add agent.
- Enter a name, for example
AD Agent 01, and click Add agent. - A dialog shows a one-time agent key. Copy the key immediately. It is shown once and cannot be retrieved again. If you lose it, delete the agent and create a new one.
- Click Done. The agent appears in the list as Disconnected until the binary calls home.
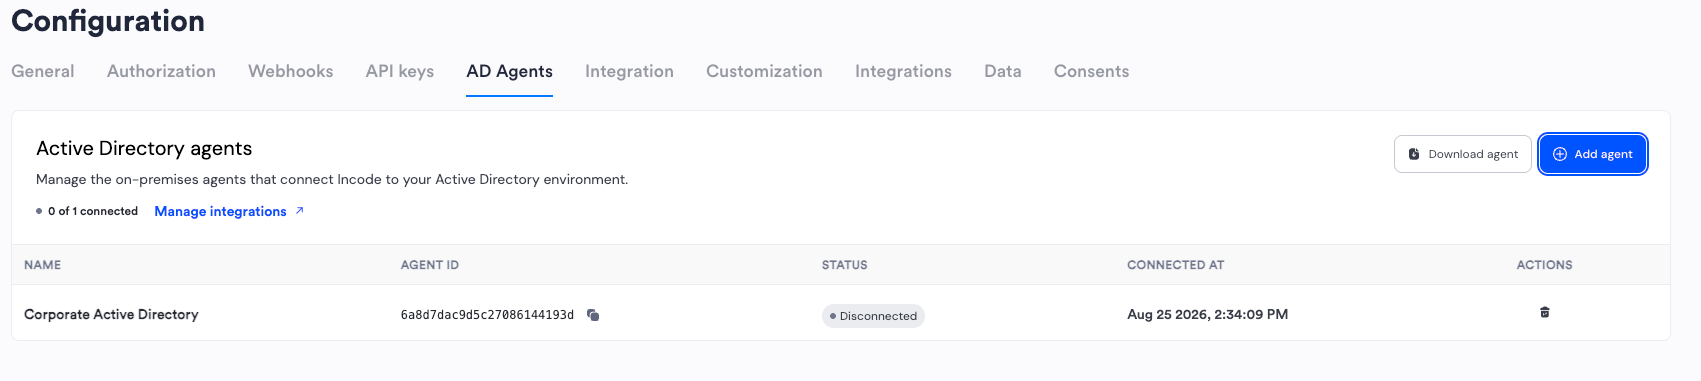
- Repeat for the second agent (
AD Agent 02).
Step 2: Install the agent on each VM
- Log in to Dashboard on the Windows VM. In the left menu, go to Configuration > AD Agents and click Download agent.
- Run the installer (a signed Windows executable). It installs the agent as a Windows service that runs non-administratively and initiates its own outbound connection.
- When prompted, paste the agent key from Step 1 for this VM.
Within a few minutes, the agent status shown in Dashboard should change to Connected. If the agent stays Disconnected, confirm outbound HTTPS/WSS from the VM to the Incode endpoint is open, and that the key was pasted correctly. Do not move on until both agents show Connected.
Step 3: Create the Active Directory integration
- In the Incode Dashboard, go to Integrations.
- In the Custom section, click to open Active Directory, then click Create new integration.
- Fill in the fields as described in the following table.
| Field | Required | What to enter | Example |
|---|---|---|---|
| Name | Yes | A label identifying the directory and environment | Corporate Active Directory |
| LDAP server | Yes | Internal hostname or IP of the domain controller; prefer a hostname matching the DC's certificate | dc01.corp.local |
| Base DN | Yes | Default search base, the narrowest DN containing every object in scope | DC=corp,DC=local |
| Service account (bind DN) | Yes | Full distinguished name of the service account from prerequisite Step 4. A bare username fails | CN=svc_incode,OU=Service Accounts,DC=corp,DC=local |
| Service account password | Yes | Password for the bind account. Encrypted at rest, never logged or returned | — |
| Domain | Optional | NetBIOS or DNS domain name, needed for DOMAIN\user formatting |
CORP |
| Entra directories | Yes | Select the synced Entra directory from prerequisite Step 2. The form does not mark it required, but the integration cannot be saved without it | — |
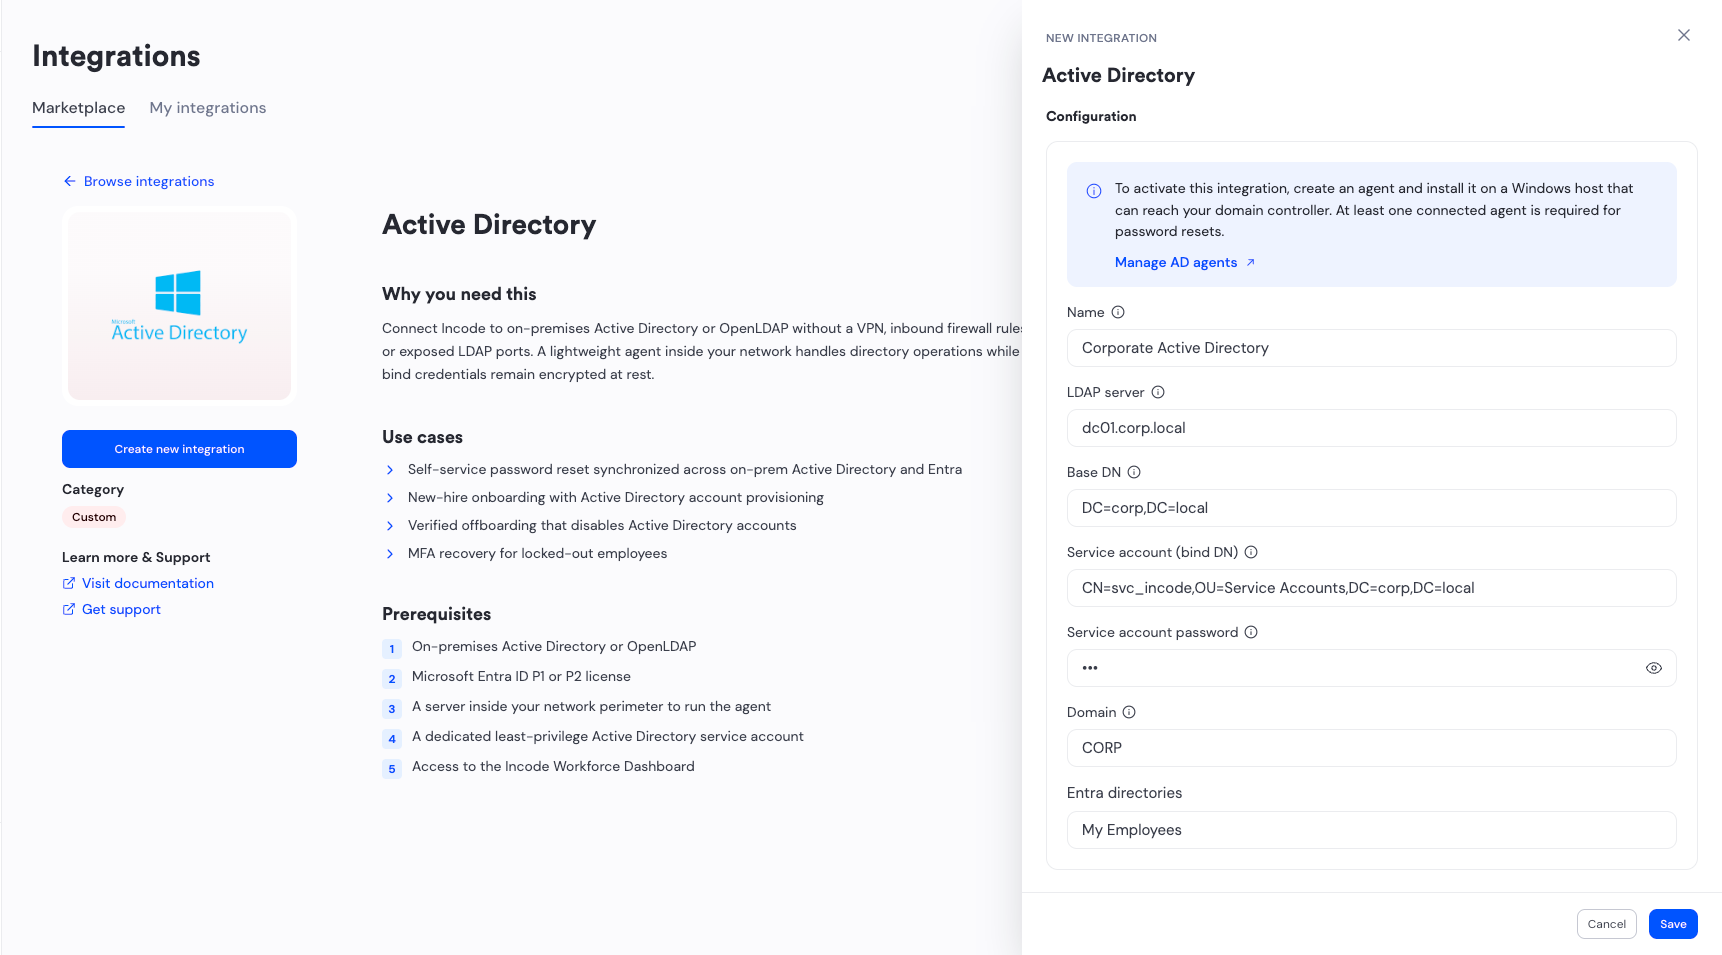
- Click Save. The form validates inline and shows Field is required under anything missing.
Note
There is no port or TLS field; the transport is fixed at LDAPS on 636. The most common error by far is a username instead of the full bind DN in the Service account field. If the connection fails immediately with an invalid-credentials error, check that first.
Step 4: Configure the Self-Serve Portal
- Go back to Integrations. Switch to the My integrations tab. Scroll to Pre-built capabilities > SelfServe Integration and click Manage.
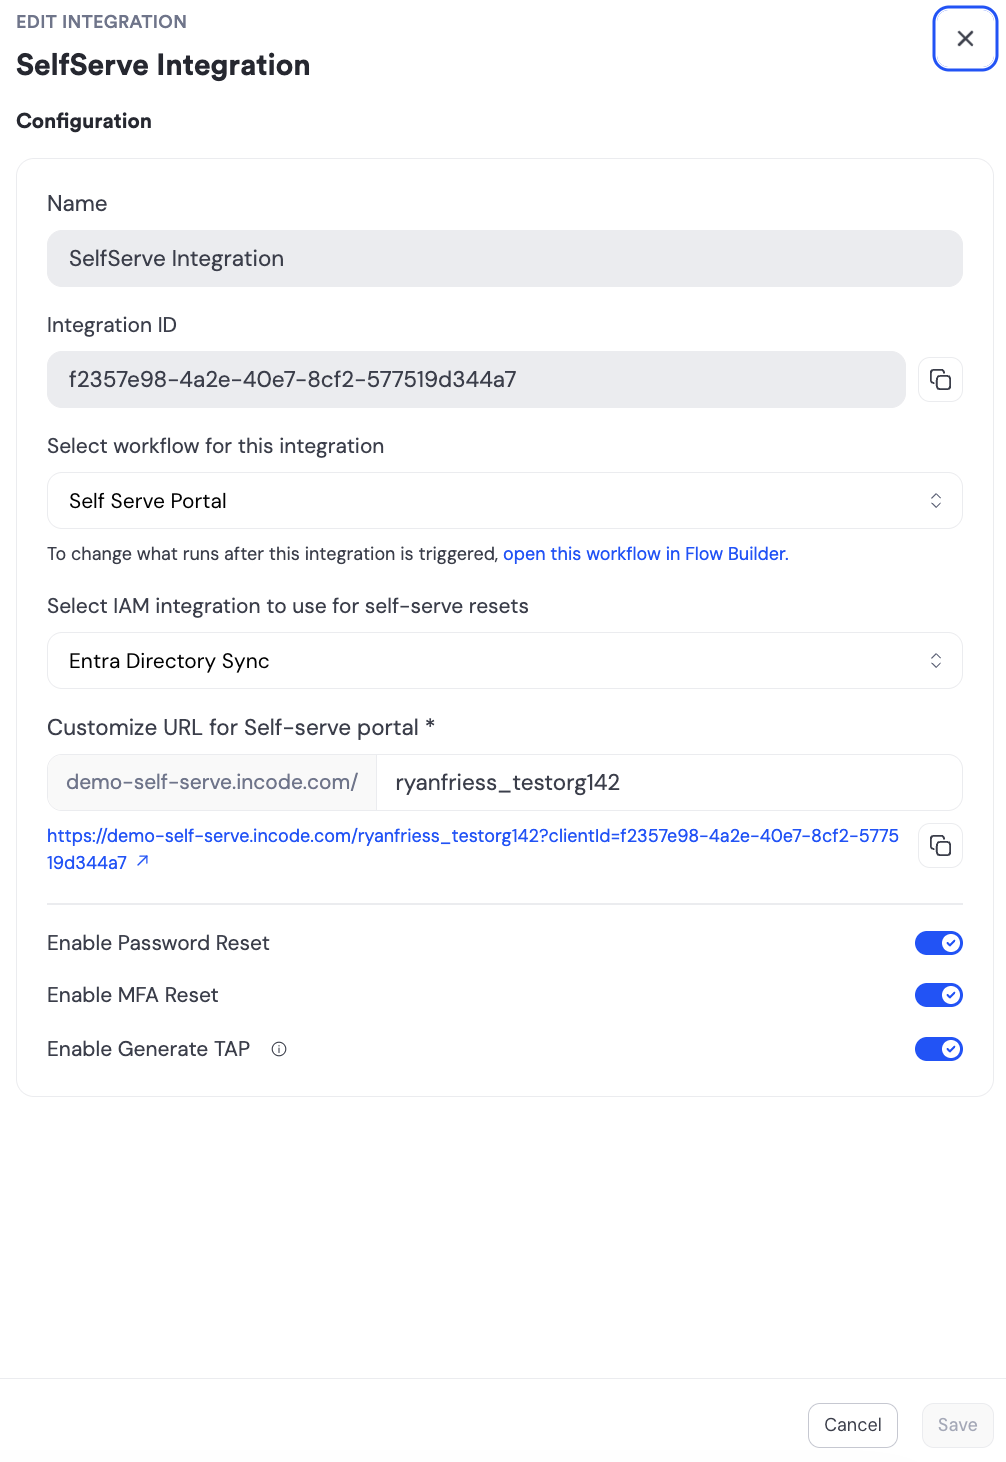
- Use the Select workflow for this integration drop-down to choose the verification workflow users will complete. The workflow must include a directory match step.
- Use the Select IAM integration to use for self-serve resets drop-down to choose your Entra Directory sync integration. Do not select the Active Directory integration here; the hybrid AD reset hop happens automatically for any Entra directory linked through the Entra directories field.
- You can Customize URL for Self-serve portal or leave the default as-is.
- Turn on Enable Password Reset, and Enable MFA Reset if in scope.
- Click Save.
Verify end to end
To test the setup, run a password reset through the Self-Serve Portal. If it goes through, identity verification, the directory lookup, and the write to Active Directory are all working.
- Pick a test user who is in the Entra group, has synced, and has completed Incode enrollment.
- Open the portal URL and complete verification as that user.
- Perform a password reset.
- In Active Directory Users and Computers, check that
pwdLastSeton the user updated, then sign in with the new password. - Confirm the operation appears in your directory audit log, attributed to the service account.
- Repeat for MFA reset if enabled.
If verification succeeds but the reset fails, the break is on the write path. Check in order:
- The Entra integration is Read and write
- Entra directory is linked via the Entra directories field
- The service account has Reset Password delegated on the user's OU
- At least one agent is Connected and can reach that domain's controller
Troubleshooting
| Symptom | Likely cause | Fix |
|---|---|---|
invalidCredentials |
Username entered instead of full bind DN, or expired/locked service account | Re-copy distinguishedName from AD; confirm the account is enabled and the password current |
| Network error or timeout | Firewall blocking the agent VM to the DC on 636 | Run Test-NetConnection from the VM and open the path |
SSL: WRONG_VERSION_NUMBER |
DC is not serving LDAPS on 636 (only plain 389) | Enable LDAPS on the DC and confirm it listens on 636 |
noSuchObject on a search |
Base DN typo, or outside the service account's read scope | Verify the Base DN string and delegated read scope |
| Resets fail while reads succeed | No connected agent, or missing Reset Password delegation | Confirm agent status and OU delegation |
| Intermittent failures, or one domain only | One agent in the pool cannot reach that domain's DC; round-robin fails a fraction of requests | Test connectivity from each VM to each DC in scope |
| Agent stays Disconnected | Outbound HTTPS/WSS blocked, or wrong agent key | Open outbound access; delete and recreate the agent for a fresh key |
Known limitations
- Simple bind only. SASL / GSSAPI / Kerberos binding is not supported.
- Two directory operations. Password reset and password-policy read only. User create, disable, enable, attribute updates, and group membership are not implemented.
- Standalone Active Directory is not supported. A linked Entra directory is required.
- LDAP referrals are not followed. Multi-forest or multi-domain environments may need a separate integration per directory server.
- Transport is fixed at LDAPS on 636. No port field and no StartTLS option on 389.