Sessions represent completed Onboardings or Authentications.
The Sessions page in Dashboard shows you all completed Sessions in a table. This table includes details about the Session, such as the Session ID, the user's Name, timestamps, the final Score, and more.
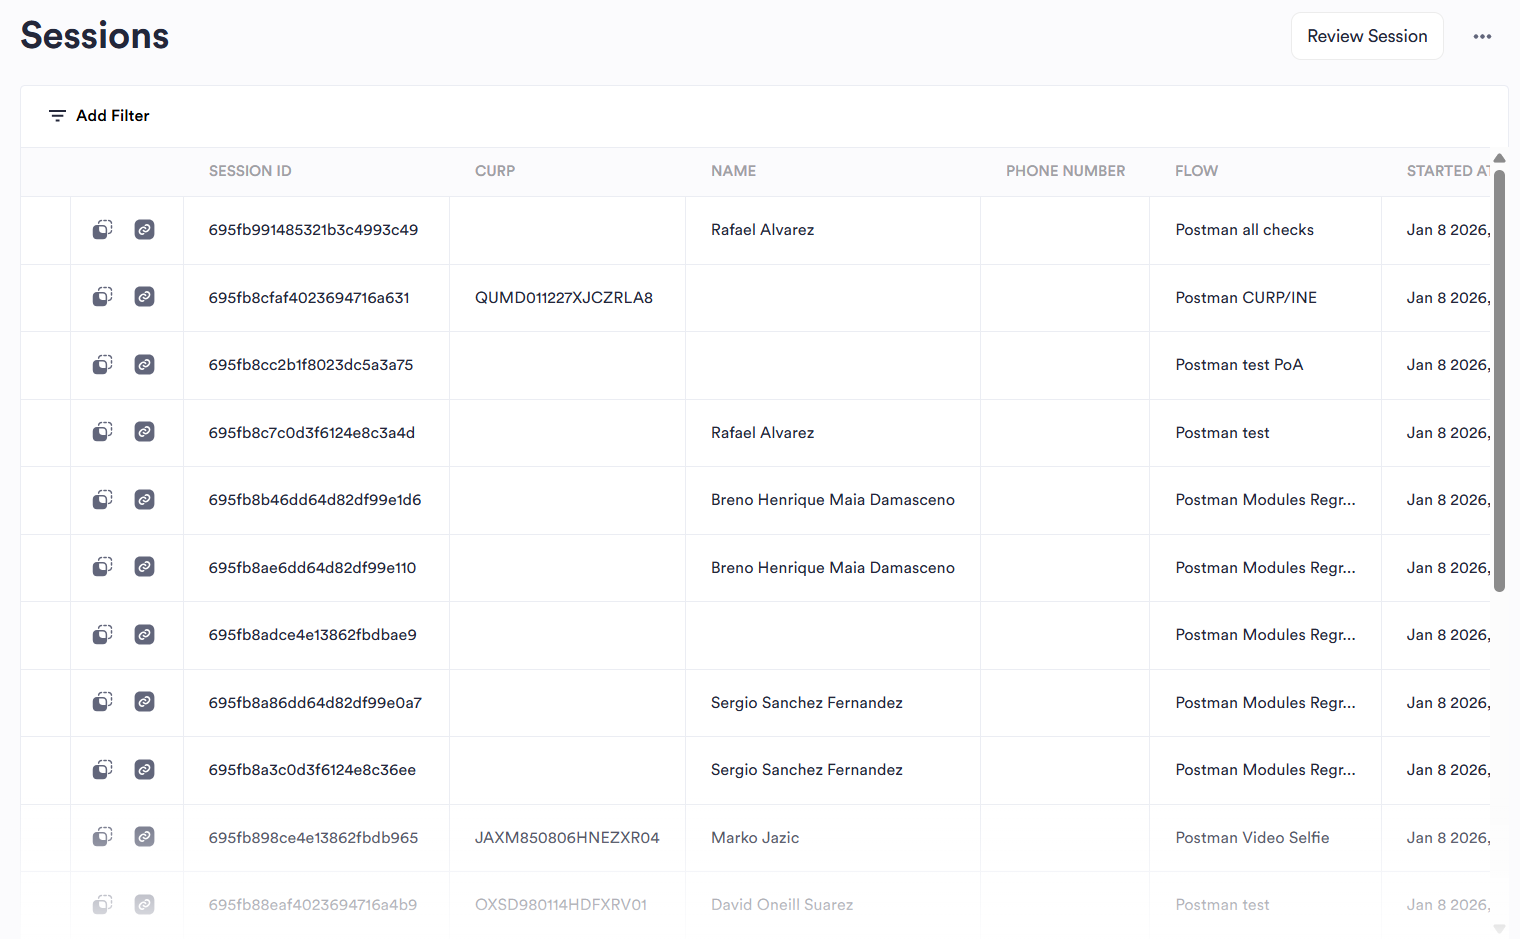
On this page, you can:
- Filter the Sessions that are shown
- Configure the view of the page
- Click a Session to enter single Session view, which provides detailed data for the Session
- Start a new manual Session
- Export the Sessions list
Filter Sessions
You can filter the list of Sessions by one or more criteria to find the Sessions you need.
In the left menu, click Sessions.
Click Add Filter in the top left.
Select the filter you want to add.
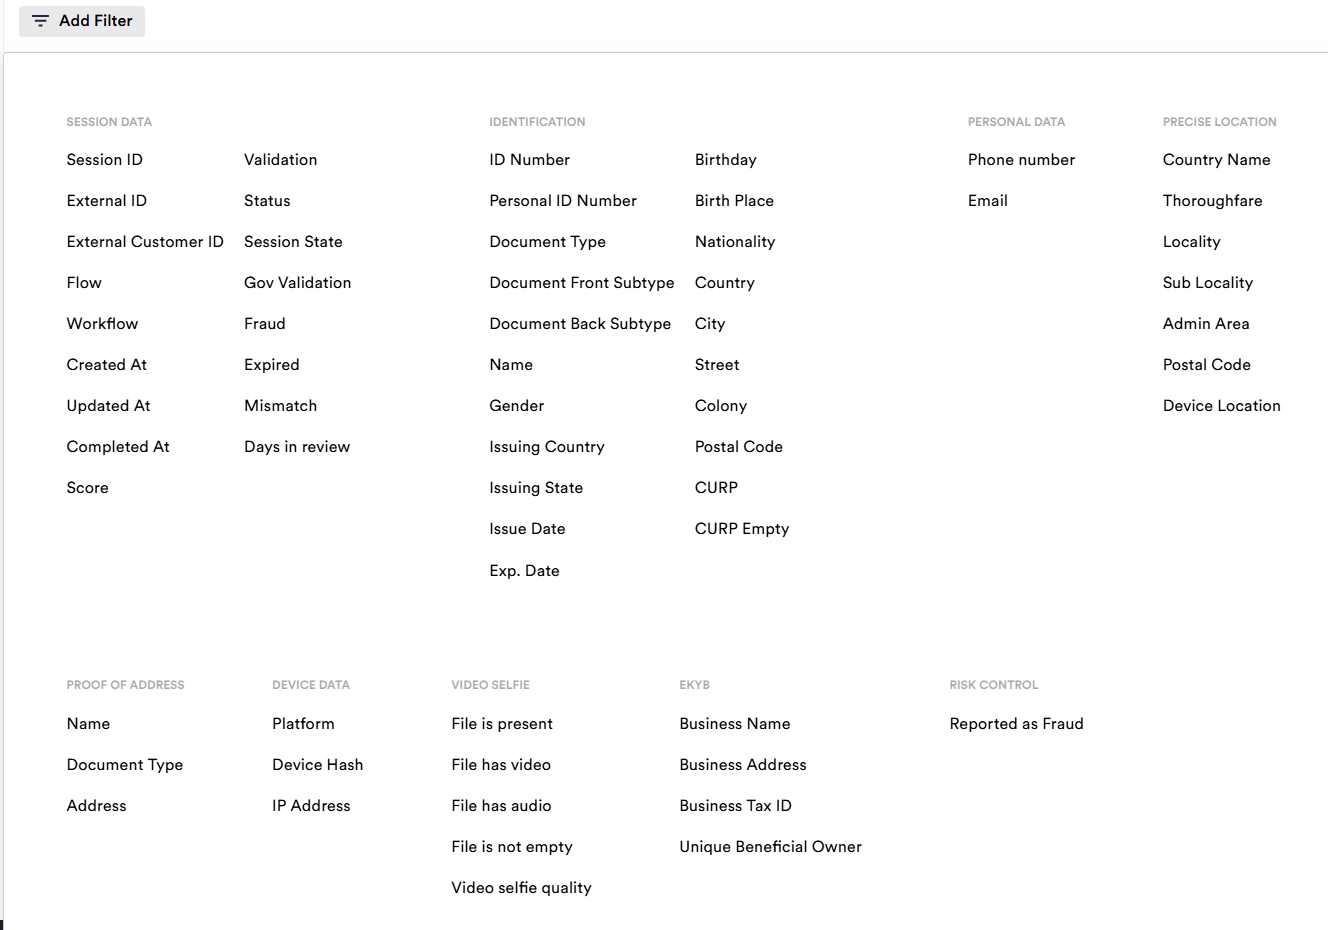
- Depending on your selection, configure the filter.
- Press
Enteror click Apply. The table displays the Sessions that fit your criteria. - Repeat these steps to add any additional filters.
Configure Sessions View
You can change the view of the Sessions table by hiding or reordering columns. Changing the view is only applied to your user; it does not impact how others see this page.
- In the left menu, click Sessions.
- Click the three dots > Table Settings.
- In the side panel, click and drag to reorder the columns. Click the eye icon next to a column to hide or show it.
- Click Save View. This view of the page is shown on future visits, even after logging out.
Start a Manual Session
Manual sessions allow you to initiate verification directly from Dashboard by sending an SMS link, rather than triggering it from your application. This is typically used in agent-assisted scenarios such as call center support, in-branch verification, or re-onboarding a user who needs to redo their verification.
In the left menu, click Sessions.
Click the three dots > New Manual Session.
Enter the customer's phone number. Change the country calling code if needed.
Use the Flow Type drop-down to select either Flow or Workflow.
Use the second drop-down to Select Session Flow or Workflow, depending on your Flow Type.
Click Send SMS.
Export Sessions
Exporting a session creates a shareable record of verification outcomes outside Dashboard, useful for compliance archiving, audits, or sharing with stakeholders who lack Dashboard access.
- In the left menu, click Sessions.
- Click the three dots, then one of the following:
- Export to CSV: Prepares a CSV file. The system shows a notification when the file is ready to download, and another when it has successfully downloaded. You can find the file in your computer's default Downloads folder.
- Export to CSV with PDF links. Prepares a CSV file with links to customers' CURPs (Mexico only) or Names, depending on what you select in the dialog. Paste the values in the dialog, then click Submit.