
Combined Consent
This component, also known as Data Sharing Consent, asks permission from the user to collect the information and photos required for onboarding.
This page walks you through setting up the Data Sharing Consent (previously known as the Combined Consent) in the Incode Dashboard. It covers configuring the consent for different languages. It will also help you specify how the consent appears to end users during the onboarding process.
You can tailor Data Sharing Consent module to fit your organization's needs. For example, you can include custom titles and terms. You can also specify which specific consents are mandatory. This flexibility ensures that the consent process is relevant and compliant with specific legal requirements.
By supporting markdown for detailed consent descriptions and enabling localization, the Incode Data Sharing Consent module makes it easier for users to understand what they're consenting to, in a language they're comfortable with. The interface is designed to be intuitive, with a clear display of mandatory and optional consents, and a straightforward process for giving or withholding consent.
The Data Sharing Consent module is designed to collect user consent for data collection and processing. Most governments consider user data privacy to be of high importance, and have regulations to that effect. Therefore, users should always be informed about data collection and processing, and their consent provided, at the start of any identity verification journey. Incode has provided default consent language which is legally accepted worldwide.
Platform support: Web, Android; iOS, Reach Native (Coming soon)
Add the module to your onboarding
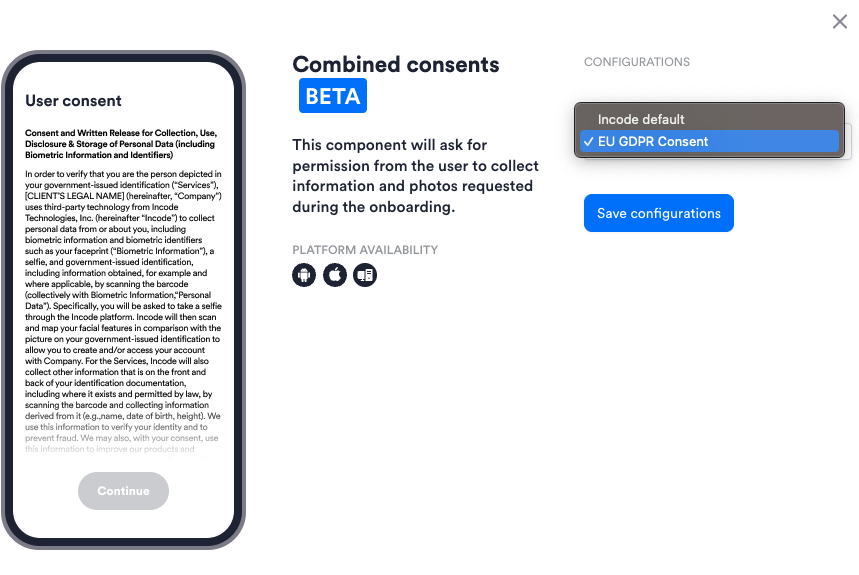
Adding the Data Sharing Consent module to a Flow or Workflow is simple. It should typically be the first module the user interacts with. These steps assume you have already started creating a Flow or Workflow.
- Choose Data Sharing Consent from the list of modules.
- Select the desired consent configuration from the list of predefined consents.
- Save the configurations to ensure they are applied to the specific Workflow node.
NOTE
What if you need multiple consents? For example, if a user needs to perform additional verification steps, then more specific consent might be required for those steps.
Workflows support adding multiple consent nodes. All consents collected will be displayed on Single Session.
Flows support only one consent module per Flow.
Define a custom consent
If you need consents in addition to the Data Sharing Consent, you can create custom consents.
-
Log in to the Incode Dashboard.
-
Navigate to Configuration > Consents. This is where all the languages, consent text, and other configurations are defined.
-
Click Add new consent.
-
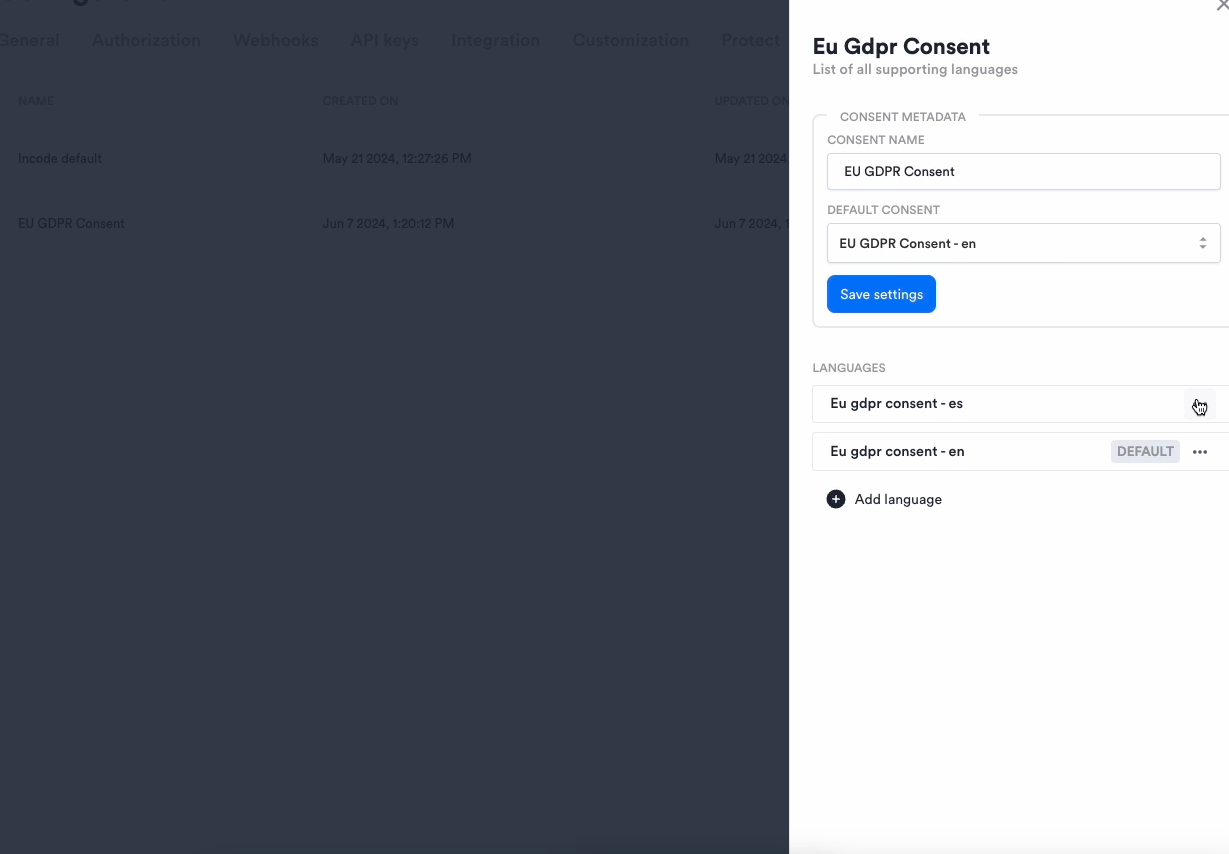
Fill in the required fields, as shown in the following image:
-
Consent Name: Name of the consent (for example, EU GDPR Consent).
-
Default Consent: Choose the default language consent from the dropdown.
-
-
Select the languages for the consent. Multiple languages are supported.
-
Configure the consent content by filling in the following fields:
- Title: Title of the consent form.
- Content: Detailed information about the consent. You can use Markdown for improved readability and structure. For supported list of markdown tags, see the next section.
-
Define the checkboxes the user sees for the consent:
- Consent Text: Text that describes what the user is consenting to (for example, "I consent to the collection of my data for identity verification purposes"). This field supports only text and hyperlinks.
- Make Optional: If granting the consent is optional, select this checkbox. Otherwise, the consent is considered mandatory and users cannot proceed unless they select the checkbox granting consent.
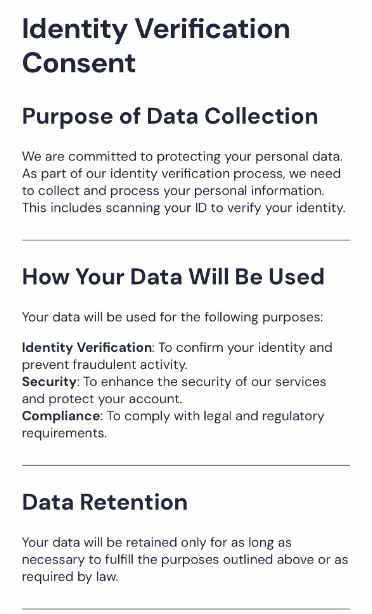
The following image shows an example of a custom consent.

Supported Markdown and HTML Tags
- Hyperlinks:
[DISPLAY_TEXT](https://your.link.com) - Emphasis:
<strong>for strong importance or bold text, and<em>for emphasized or italic text. - Headings:
<h1>,<h2>,<h3>for heading levels, with<h1>being the largest. - Paragraphs:
<p>defines a paragraph. - Line Breaks:
<br>inserts a line break. - Horizontal Rule:
<hr>represents a horizontal line. - Lists:
<ul>,<ol>,<li>for unordered (bullet) and ordered (numbered) lists. - Markdown Shortcuts:
*for bullet points,*text*for italic text,**text**for bold text,#, ##, ###for headings.
End User Experience
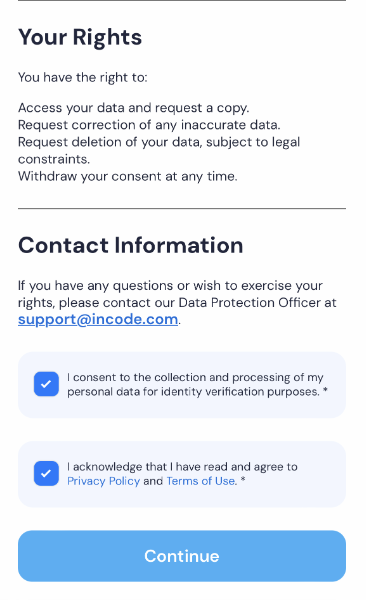
When users go through the onboarding process, they are presented with the Data Sharing Consent and any custom consent forms you may have configured. As shown in the following image, the user interface displays:
- A clear title.
- Detailed consent information.
- Mandatory and optional consent checkboxes.
- A "Continue" button that is enabled only after all mandatory consents are checked.
Single session Dashboard results
To see the user consent status for a session, go to Dashboard > Sessions, click a session, and then click the Other tab.

Updated 3 months ago