
Forms
Capture
Welcome to the Forms Module User Guide. In today's digital environment, the need for robust, flexible, and efficient identity verification processes is more critical than ever. Whether you're a financial institution, a government entity, or a private business, ensuring that user data is accurate and secure is paramount. The Forms Module is a powerful tool designed to enhance your identity verification system by allowing for the dynamic collection of user information based on specific needs and conditions.
The Forms Module integrates seamlessly into your existing systems, providing a customizable interface for data collection that adapts based on predefined rules and user responses. This capability ensures that you gather only the necessary information, maintaining user convenience while adhering to compliance requirements.
This guide aims to introduce you to the fundamental aspects of the Forms Module, from basic setup and configuration to implementing conditional logic that tailors the user experience. Whether you are looking to enhance your data collection for compliance purposes, improve user interaction, or ensure a higher level of data accuracy, the Forms Module offers the tools and flexibility needed to meet these objectives.
In the following sections, we will explore various practical use cases, detailed configuration options, and advanced features of the Forms Module. Our goal is to provide you with all the information you need to successfully implement and benefit from this versatile tool in your identity verification processes.
Integration
The Forms Module is a dynamic tool designed to collect user information and navigate user journeys by utilizing form responses in workflow conditions.
Platform support: Web (Released), iOS, Android, Reach Native (Coming soon)
Module Configuration
Forms module belongs to Module type of nodes and can be added to a workflow
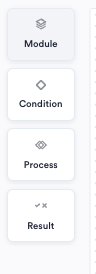
Forms can be found under Modules
Setting up a Form
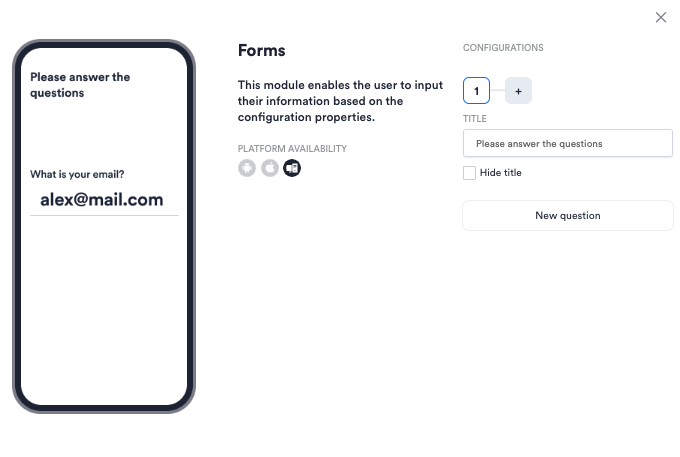
Once Forms module is added to workflow, you can add multiple questions that your user should answer and configure the forms
-
Title Configuration:
-
You have the option to set a title for the form that will appear at the top of the screen.
-
You can choose to hide the title if preferred.
Configuration of Forms module
-
-
Question Pages:
-
Forms can have questions spread across one or multiple pages, depending on your needs.
-
Each page can contain one or multiple questions.
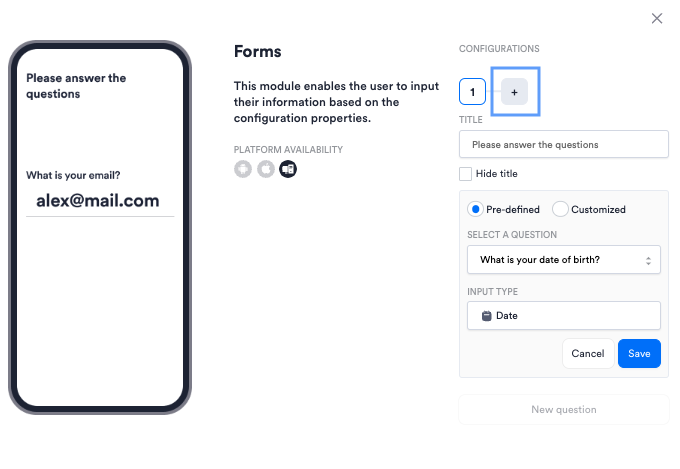
Add a new page with question by clicking on plus button
-
-
Adding Questions:
-
Click on "New Question" to add additional queries to your form.
-
You can edit or delete questions as required.
Adding a new question
-
-
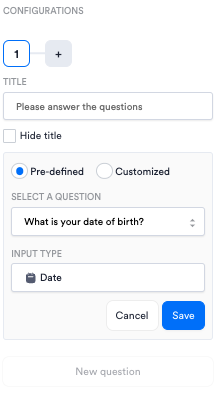
Pre-defined & Custom Questions:
- Select from a set of pre-defined questions or create your custom questions.
- Assign the appropriate input type for each question.
-
Input Types:
- Choose from various input types to match your question format. This ensures that data is collected efficiently and accurately.
- Supported input types: Text, Number, Date, Country, Phone, Email, CPF (Document number format for Brazilian documents), Yes or No question
Conditions
-
Conditions Based on Responses:
-
Utilize the answers collected from forms to create conditions in workflows.
-
For instance, you can route users down different paths based on their country of residence.
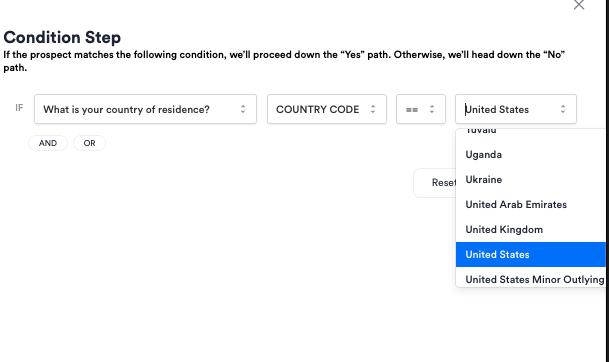
Adding question from Forms module in Condition
-
-
Configuring Conditions:
- Within the workflow, choose the form question you wish to use as a condition.
- Set the condition criteria (e.g., a specific date or country code).
- Learn more about Conditions here
End User Experience
The user experience (UX) for end-users utilizing the form module appears straightforward and intuitive based on the provided screenshots.
-
Question and Answer Interface:
- Users are presented with a series of questions specified in the Forms Module Configuration. Each question has a dedicated input field that suggests the type of answer expected.
- For text responses, such as "What is your email address?" or "What is your name?", users can type their information into text boxes.
- The date of birth requires a specific format (DD/MM/YYYY), guiding users to enter their birthdate correctly.
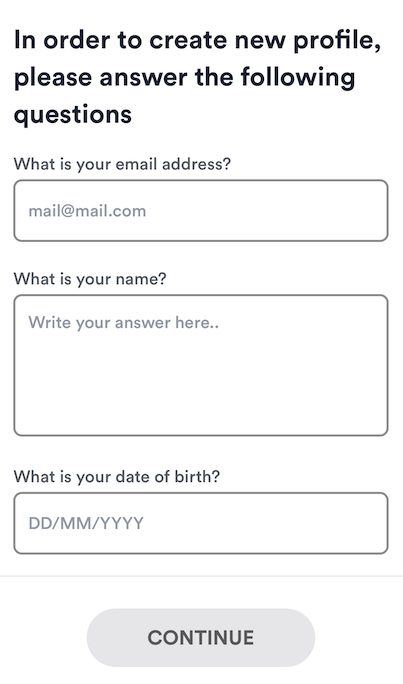
End user experience: Title is configured on the Forms Module, Questions have placeholders based on the expected input type
-
Selection Menus:
- For questions regarding the country of residence or nationality, users are given selection menus where they can choose from a list, indicated by dropdown arrows. This likely includes a search feature to find the correct country quickly.
- Flags next to the country options provide a visual cue, aiding users in finding and selecting their country faster.
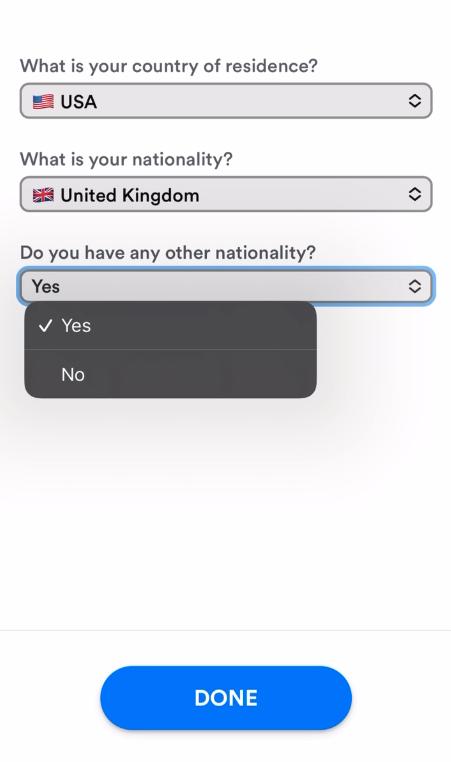
End user experience: User can choose country from the list
-
Toggle Switch for Binary Choices:
- For yes/no questions, such as "Do you have any other nationality?", there is a toggle switch or a dropdown menu allowing users to choose between 'Yes' or 'No'. This interaction is clear-cut and simple.
-
Navigation Buttons:
- ‘CONTINUE’ and ‘DONE’ buttons at the bottom of the screens allow users to navigate through the form. ‘CONTINUE’ leads to the next set of questions when Forms are configured to use multiple pages, whereas ‘DONE’ is used to complete the entire form.
Single Session Dashboard Results
-
User responses are visible on the Single session view in the Other tab
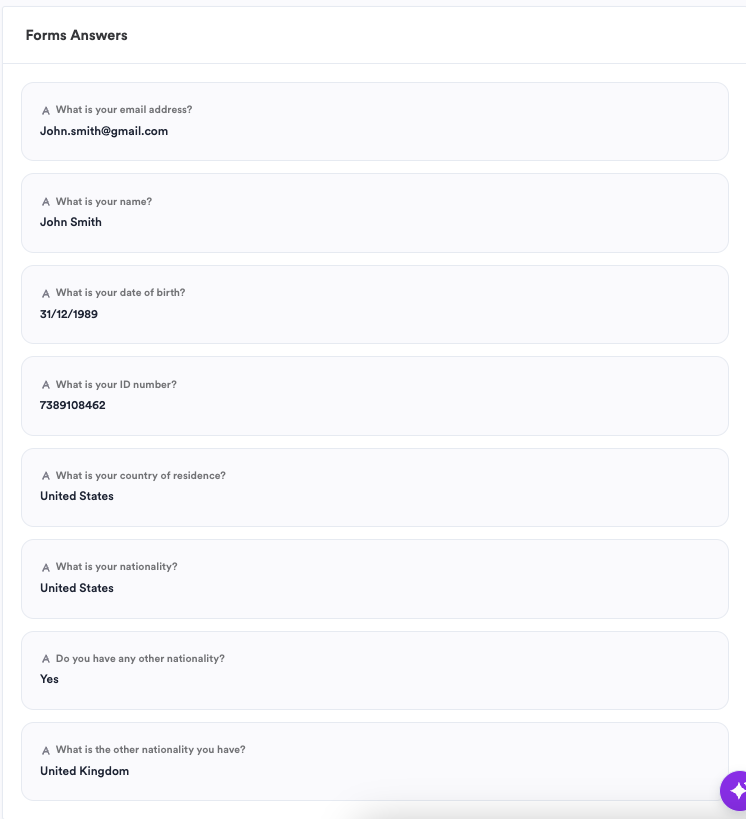
Questions and Answers are visible on Single Session under Other tab
Results API
-
This API endpoint retrieves all questions and answers that a user has responded to during a specified session, regardless of the form module configurations used. It consolidates all the user's responses into one accessible API.Endpoint OverviewURLGET /omni/form/answers?interviewId=<interviewId>Parameters- interviewId: This is a unique identifier for the session during which the user has provided responses. It is provided at the start of the session or forwarded via a redirect link when the user completes the session.
Headers- X-Api-Key: Your unique API key.
- X-Incode-Hardware-Id: A JWT token of ACCESS type. Note: Only Admin tokens are supported; Session tokens cannot be used to retrieve data.
- api-version: 1.0
The response is structured as a JSON object containing an array of answers. Each object in the array represents a question and its corresponding response(s).Response Structure- answers: Array of objects containing:
- question: String. The question presented to the user.
- answerDetails: Object containing:
- singleAnswer: String. The user's answer to the question.
- selectedAnswers: Array. List of selected answers (Note: This is currently unsupported and will always return an empty list).
- inputType: String. Indicates the type of input used for the answer (e.g., EMAIL, TEXT, DATE, NUMBER, COUNTRY, YESNO).
TheNote onselectedAnswersselectedAnswersfield is intended to support multiple selected answers for applicable questions. Currently, this functionality is not supported and will always return as an empty list.
Dates in responses are returned as milliseconds since the Unix epoch (UTC). For example, the date "March 1, 1990" would be represented asDate Format631152000000milliseconds.
To convert the millisecond timestamp to a human-readable date format in JavaScript:Date Conversion Examplefunction convertToDate(milliseconds) { const date = new Date(parseInt(milliseconds)); return date.toISOString(); // Returns date in YYYY-MM-DDTHH:mm:ss.sssZ format }
Country codes in responses are returned using ISO 3166-1 alpha-3 format. For example, "USA" for the United States of America, "GBR" for Great Britain.Country Code FormatExample Response{ "answers": [ { "question": "What is your email address?", "answerDetails": { "singleAnswer": "[email protected]", "selectedAnswers": [] }, "inputType": "EMAIL" }, { "question": "What is your name?", "answerDetails": { "singleAnswer": "John Smith", "selectedAnswers": [] }, "inputType": "TEXT" }, { "question": "What is your date of birth?", "answerDetails": { "singleAnswer": "631152000000", "selectedAnswers": [] }, "inputType": "DATE" }, { "question": "What is your ID number?", "answerDetails": { "singleAnswer": "7389108462", "selectedAnswers": [] }, "inputType": "NUMBER" }, { "question": "What is your country of residence?", "answerDetails": { "singleAnswer": "USA", "selectedAnswers": [] }, "inputType": "COUNTRY" }, { "question": "What is your nationality?", "answerDetails": { "singleAnswer": "USA", "selectedAnswers": [] }, "inputType": "COUNTRY" }, { "question": "Do you have any other nationality?", "answerDetails": { "singleAnswer": "YES", "selectedAnswers": [] }, "inputType": "YESNO" }, { "question": "What is the other nationality you have?", "answerDetails": { "singleAnswer": "GBR", "selectedAnswers": [] }, "inputType": "COUNTRY" } ] }Usage Considerations- Ensure that the API key and hardware ID are correctly provided to authenticate and authorize the API request.
- The endpoint only retrieves data for a specific session as identified by the
interviewId.
Practical Use Cases
Integrating forms modules into an identity verification process can significantly enhance the flexibility and accuracy of data collection, especially when dealing with diverse user demographics and document types. Here are some practical examples where incorporating forms modules can be particularly beneficial:
-
Address Verification Post-ID Capture:
- Scenario: When verifying identities, it's common to require an address, but not all identification documents include this information.
- Implementation: After capturing and validating an ID that does not contain an address, you can employ conditional logic to trigger a form module. This module would prompt the user to manually enter their address. This ensures that you collect complete user information necessary for further processing or compliance purposes.
-
CPF Number Collection in Brazil:
- Scenario: In Brazil, the CPF (Cadastro de Pessoas Físicas) is a crucial identifier for financial and legal transactions. However, some Brazilian documents, like certain types of ID cards, do not include the CPF number.
- Implementation: You can configure the system to detect when a document lacks a CPF number and activate a form module. This module would ask the user to manually input their CPF number, which can then be verified against official sources. This step is essential for fulfilling regulatory requirements and ensuring accurate user verification. Learn more about verification with Brazilian system of record here.
-
Country-Specific Document Requests:
- Scenario: Different countries may have different requirements for identity verification, often necessitating different types of documents.
- Implementation: A form module can be used to ask users if they are citizens or residents of a specific country. Based on their response, the system can conditionally request the appropriate documents for verification. For instance, if a user indicates they are a resident but not a citizen, additional documentation such as a residency permit might be required.
-
Enhanced Due Diligence for High-Risk Profiles:
- Scenario: For users identified as high-risk, either through initial data checks or external databases, enhanced due diligence may be necessary.
- Implementation: Use a form module to collect additional information, such as the source of funds or employment details, which can be crucial for compliance with anti-money laundering (AML) regulations.
-
Custom Data Collection for Specific Applications:
- Scenario: Certain applications, like opening a bank account or registering for government services, might require specific information that is not typically found on standard IDs.
- Implementation: Implement form modules to collect this unique information, such as tax information or previous addresses, depending on the specific requirements of the application.
By employing forms modules with conditional logic in these scenarios, you can collect all necessary information efficiently while adapting to the diverse needs of the user base. This approach not only streamlines the verification process but also enhances the user experience by asking for additional data only when absolutely necessary.
Best practices
- Consistency: Ensure that each question is clear and consistent with the input type selected.
- Relevance: Only ask for information that is relevant to the user journey or required for your service.
- Privacy: Respect user privacy by not asking for unnecessary personal information.
- Test Thoroughly: Before going live, test the form with a range of inputs to ensure all conditions work as expected.
Updated over 1 year ago