ID Validation
Instructions for validating a user ID as part of a batch process onboarding
Introduction
Depending on the type of ID document the user has provided, up to three endpoint calls may be required to validate the ID. If a document only has one side, such as a passport, there is no need to call the back-id endpoint. However, endpoints should be called in the general order shown:
- Add front side of ID
/omni/add/front-id/v2 - Add back side of ID
/omni/add/back-id/v2 - Process Id
/omni/process/id
Can I reprocess an ID using an existing upload?No. If you need to reprocess an ID, you must repeat the upload of ID images before calling the
/omni/process/idendpoint again.
Header requirements
Each of the three endpoints requires these header values.
| Header | Value |
|---|---|
x-api-key | The API key provided to you by Incode |
api-version | "1.0" |
X-Incode-Hardware-Id | The Session Token obtained when you started the onboarding session. |
Body/image requirements
Images of ID documents must be provided in the request body as a base64 encoded string. Both front and back ID images are subject to these requirements:
- Images should be at least 1000 pixels on one dimension, either width or height.
- Requests cannot exceed 10 MB. See limitations of the API for more information.
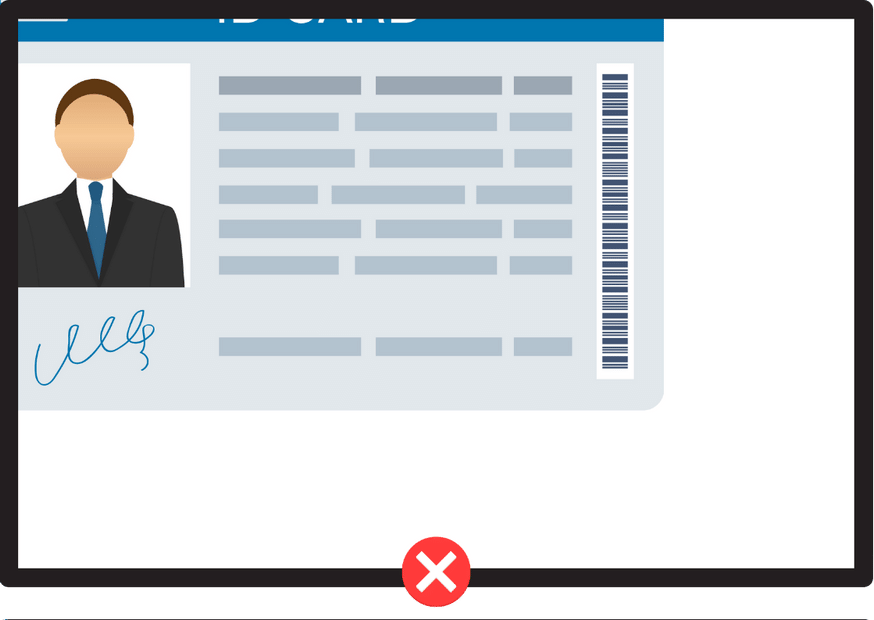
- IDs must be fully visible in the image. No edges or corners should be removed. Otherwise, the image is invalid.
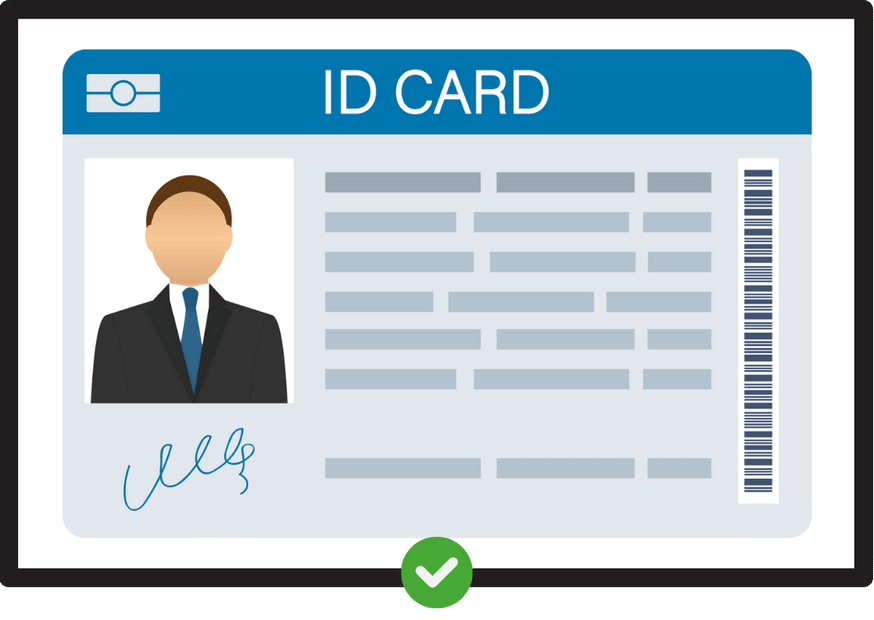
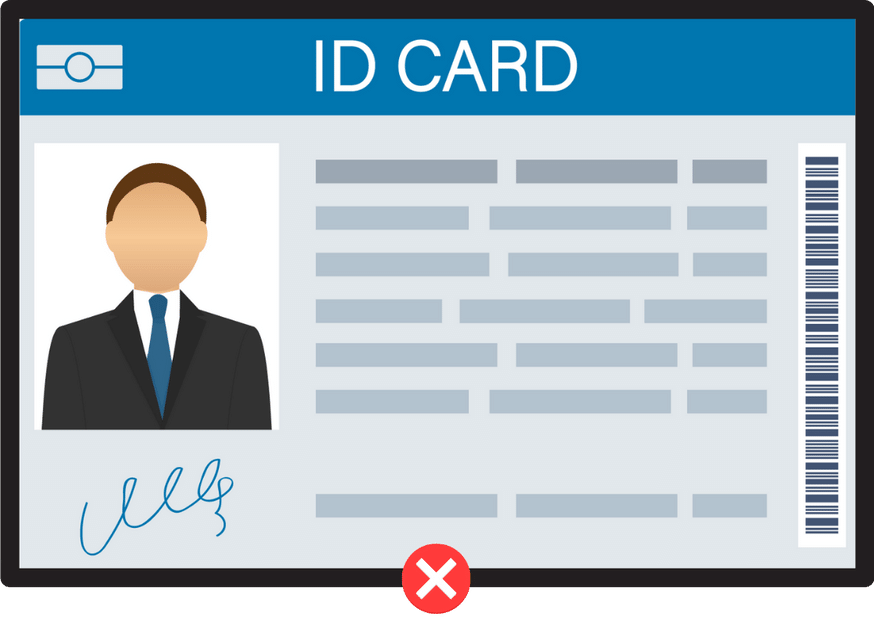
- There should be some padding (space) between the image edges and the ID edges, as illustrated here. Otherwise, the image is invalid.
| Image | Description |
|---|---|
 | Valid image. There's a clear padding between the ID and the image borders. Id is fully visible |
 | Invalid image. The ID is cropped and not fully visible |
 | Invalid image. While the ID is fully visible, there's no padding with the image borders. |
Sample Code
Front Id
curl --location 'https://demo-api.incodesmile.com/omni/add/front-id/v2' \
--header 'Content-Type: application/json' \
--header 'api-version: 1.0' \
--header 'x-api-key: <your_api_key>' \
--header 'X-Incode-Hardware-Id: <your_session_token>' \
--data '{
    "base64Image": ""
}'
const axios = require('axios');
const fs = require('fs');
// Read your image file and encode as base64
const imageFilePath = 'path/to/your/image.jpg';
const base64 = fs.readFileSync(imageFilePath, { encoding: 'base64' });
const data = JSON.stringify({
base64Image: base64
});
const config = {
method: 'post',
url: 'https://demo-api.incodesmile.com/omni/add/front-id/v2',
headers: {
'Content-Type': 'application/json',
'api-version': '1.0',
'x-api-key': '<your_api_key>',
'X-Incode-Hardware-Id': '<your_session_token>'
},
data : data
};
axios(config)
.then(function (response) {
console.log(response.data);
})
.catch(function (error) {
console.log(error);
});
var client = HttpClient.newHttpClient();

// Read your image file and encode as base64
Path imagePath = Path.of("path/to/your/image.jpg");
String base64 = Base64.getEncoder().encodeToString(Files.readAllBytes(imagePath));

var request = HttpRequest.newBuilder()
  .uri(URI.create("https://demo-api.incodesmile.com/omni/add/front-id/v2"))
  .header("Content-Type", "application/json")
  .header("api-version", "1.0")
  .header("x-api-key", "<your_api_key>")
  .header("X-Incode-Hardware-Id", "<your_session_token>")
  .POST(BodyPublishers.ofString("{\"base64Image\":\"" + base64 + "\"}"))
  .build();

var response = client.send(request, BodyHandlers.ofString());
System.out.println(response.body());
using var client = new HttpClient();
// Read your image file and encode as base64
var imageFilePath = "path/to/your/image.jpg";
var base64 = Convert.ToBase64String(File.ReadAllBytes(imageFilePath));
var json = "{\"base64Image\":\"" + base64 + "\"}";
var content = new StringContent(json, Encoding.UTF8, "application/json");
client.DefaultRequestHeaders.Add("api-version", "1.0");
client.DefaultRequestHeaders.Add("x-api-key", "<your_api_key>");
client.DefaultRequestHeaders.Add("X-Incode-Hardware-Id", "<your_session_token>");
var response = await client.PostAsync("https://demo-api.incodesmile.com/omni/add/front-id/v2", content);
var responseString = await response.Content.ReadAsStringAsync();
Console.WriteLine(responseString);import requests
import base64
# Read your image file and encode as base64
image_file_path = 'path/to/your/image.jpg'
with open(image_file_path, "rb") as image_file:
base64 = base64.b64encode(image_file.read()).decode('utf-8')
url = "https://demo-api.incodesmile.com/omni/add/front-id/v2"
payload = {
"base64Image": base64
}
headers = {
'Content-Type': 'application/json',
'api-version': '1.0',
'x-api-key': '<your_api_key>',
'X-Incode-Hardware-Id': '<your_session_token>'
}
response = requests.post(url, json=payload, headers=headers)
print(response.text)
You don't need to store anything from the response. To learn more about what the response includes, see the Add front side of ID endpoint documentation.
Back Id
curl --location 'https://demo-api.incodesmile.com/omni/add/back-id/v2' \
--header 'Content-Type: application/json' \
--header 'api-version: 1.0' \
--header 'x-api-key: <your_api_key>' \
--header 'X-Incode-Hardware-Id: <your_session_token>' \
--data '{
    "base64Image": ""
}'
const axios = require('axios');
const fs = require('fs');
// Read your image file and encode as base64
const imageFilePath = 'path/to/your/image.jpg';
const base64 = fs.readFileSync(imageFilePath, { encoding: 'base64' });
const data = JSON.stringify({
base64Image: base64
});
const config = {
method: 'post',
url: 'https://demo-api.incodesmile.com/omni/add/back-id/v2',
headers: {
'Content-Type': 'application/json',
'api-version': '1.0',
'x-api-key': '<your_api_key>',
'X-Incode-Hardware-Id': '<your_session_token>'
},
data : data
};
axios(config).then(function (response) {
console.log(response.data);
});
var client = HttpClient.newHttpClient();

// Read your image file and encode as base64
Path imagePath = Path.of("path/to/your/image.jpg");
String base64 = Base64.getEncoder().encodeToString(Files.readAllBytes(imagePath));

var request = HttpRequest.newBuilder()
  .uri(URI.create("https://demo-api.incodesmile.com/omni/add/back-id/v2"))
  .header("Content-Type", "application/json")
  .header("api-version", "1.0")
  .header("x-api-key", "<your_api_key>")
  .header("X-Incode-Hardware-Id", "<your_session_token>")
  .POST(BodyPublishers.ofString("{\"base64Image\":\"" + base64 + "\"}"))
  .build();

var response = client.send(request, BodyHandlers.ofString());
System.out.println(response.body());
using var client = new HttpClient();
// Read your image file and encode as base64
var imageFilePath = "path/to/your/image.jpg";
var base64 = Convert.ToBase64String(File.ReadAllBytes(imageFilePath));
var json = "{\"base64Image\":\"" + base64 + "\"}";
var content = new StringContent(json, Encoding.UTF8, "application/json");
client.DefaultRequestHeaders.Add("api-version", "1.0");
client.DefaultRequestHeaders.Add("x-api-key", "<your_api_key>");
client.DefaultRequestHeaders.Add("X-Incode-Hardware-Id", "<your_session_token>");
var response = await client.PostAsync("https://demo-api.incodesmile.com/omni/add/back-id/v2", content);
var responseString = await response.Content.ReadAsStringAsync();
Console.WriteLine(responseString);import requests
import base64
# Read your image file and encode as base64
image_file_path = 'path/to/your/image.jpg'
with open(image_file_path, "rb") as image_file:
base64 = base64.b64encode(image_file.read()).decode('utf-8')
url = "https://demo-api.incodesmile.com/omni/add/back-id/v2"
payload = {
"base64Image": base64
}
headers = {
'Content-Type': 'application/json',
'api-version': '1.0',
'x-api-key': '<your_api_key>',
'X-Incode-Hardware-Id': '<your_session_token>'
}
response = requests.post(url, json=payload, headers=headers)
print(response.text)
You don't need to store anything from the response. To learn more about what the response includes, see the Add back side of ID endpoint documentation.
Process Id
curl --location 'https://demo-api.incodesmile.com/omni/process/id' \
--header 'Content-Type: application/json' \
--header 'api-version: 1.0' \
--header 'x-api-key: <your_api_key>' \
--header 'X-Incode-Hardware-Id: <your_session_token>' \
--data '{}'
const axios = require('axios');

const config = {
  method: 'post',
  url: 'https://demo-api.incodesmile.com/omni/process/id',
  headers: {
    'Content-Type': 'application/json',
    'api-version': '1.0',
    'x-api-key': '<your_api_key>',
    'X-Incode-Hardware-Id': '<your_session_token>'
  }
};

axios(config).then(function (response) {
  console.log(response.data);
});
var client = HttpClient.newHttpClient();

var request = HttpRequest.newBuilder()
  .uri(URI.create("https://demo-api.incodesmile.com/omni/process/id"))
  .header("Content-Type", "application/json")
  .header("api-version", "1.0")
  .header("x-api-key", "<your_api_key>")
  .header("X-Incode-Hardware-Id", "<your_session_token>")
  .POST(BodyPublishers.ofString("{}"))
  .build();

var response = client.send(request, BodyHandlers.ofString());
System.out.println(response.body());
using var client = new HttpClient();
var content = new StringContent("{}", Encoding.UTF8, "application/json");
client.DefaultRequestHeaders.Add("api-version", "1.0");
client.DefaultRequestHeaders.Add("x-api-key", "<your_api_key>");
client.DefaultRequestHeaders.Add("X-Incode-Hardware-Id", "<your_session_token>");
var response = await client.PostAsync("https://demo-api.incodesmile.com/omni/process/id", content);
var responseString = await response.Content.ReadAsStringAsync();
Console.WriteLine(responseString);import requests
url = "https://demo-api.incodesmile.com/omni/process/id"
headers = {
'Content-Type': 'application/json',
'api-version': '1.0',
'x-api-key': '<your_api_key>',
'X-Incode-Hardware-Id': '<your_session_token>'
}
response = requests.post(url, json={}, headers=headers)
print(response.text)
This is the final ID validation step. After this step completes successfully, you can see the ID section score by going to Dashboard > Sessions, then locating and selecting the session. You can also view the score using the fetch scores api.
Updated 14 days ago
