
OIDC Authentication Links
An introduction to our OIDC authentication solution
Our OIDC authentication solution combines industry standard OIDC authentication practices with Incode's 1:1 and 1:N authentication API endpoints. Similarly to 1:N authentication links (without OIDC), this integration route also includes Incode's hosted capture experience. This guide below details an OIDC integration for 1:1 authentication. To switch to OIDC authentication with 1:N, there are a couple minor configuration changes that need to be made on the OIDC authorization protocol in the dashboard, please contact customer support for assistance if you need to do 1:N instead.
How it works?
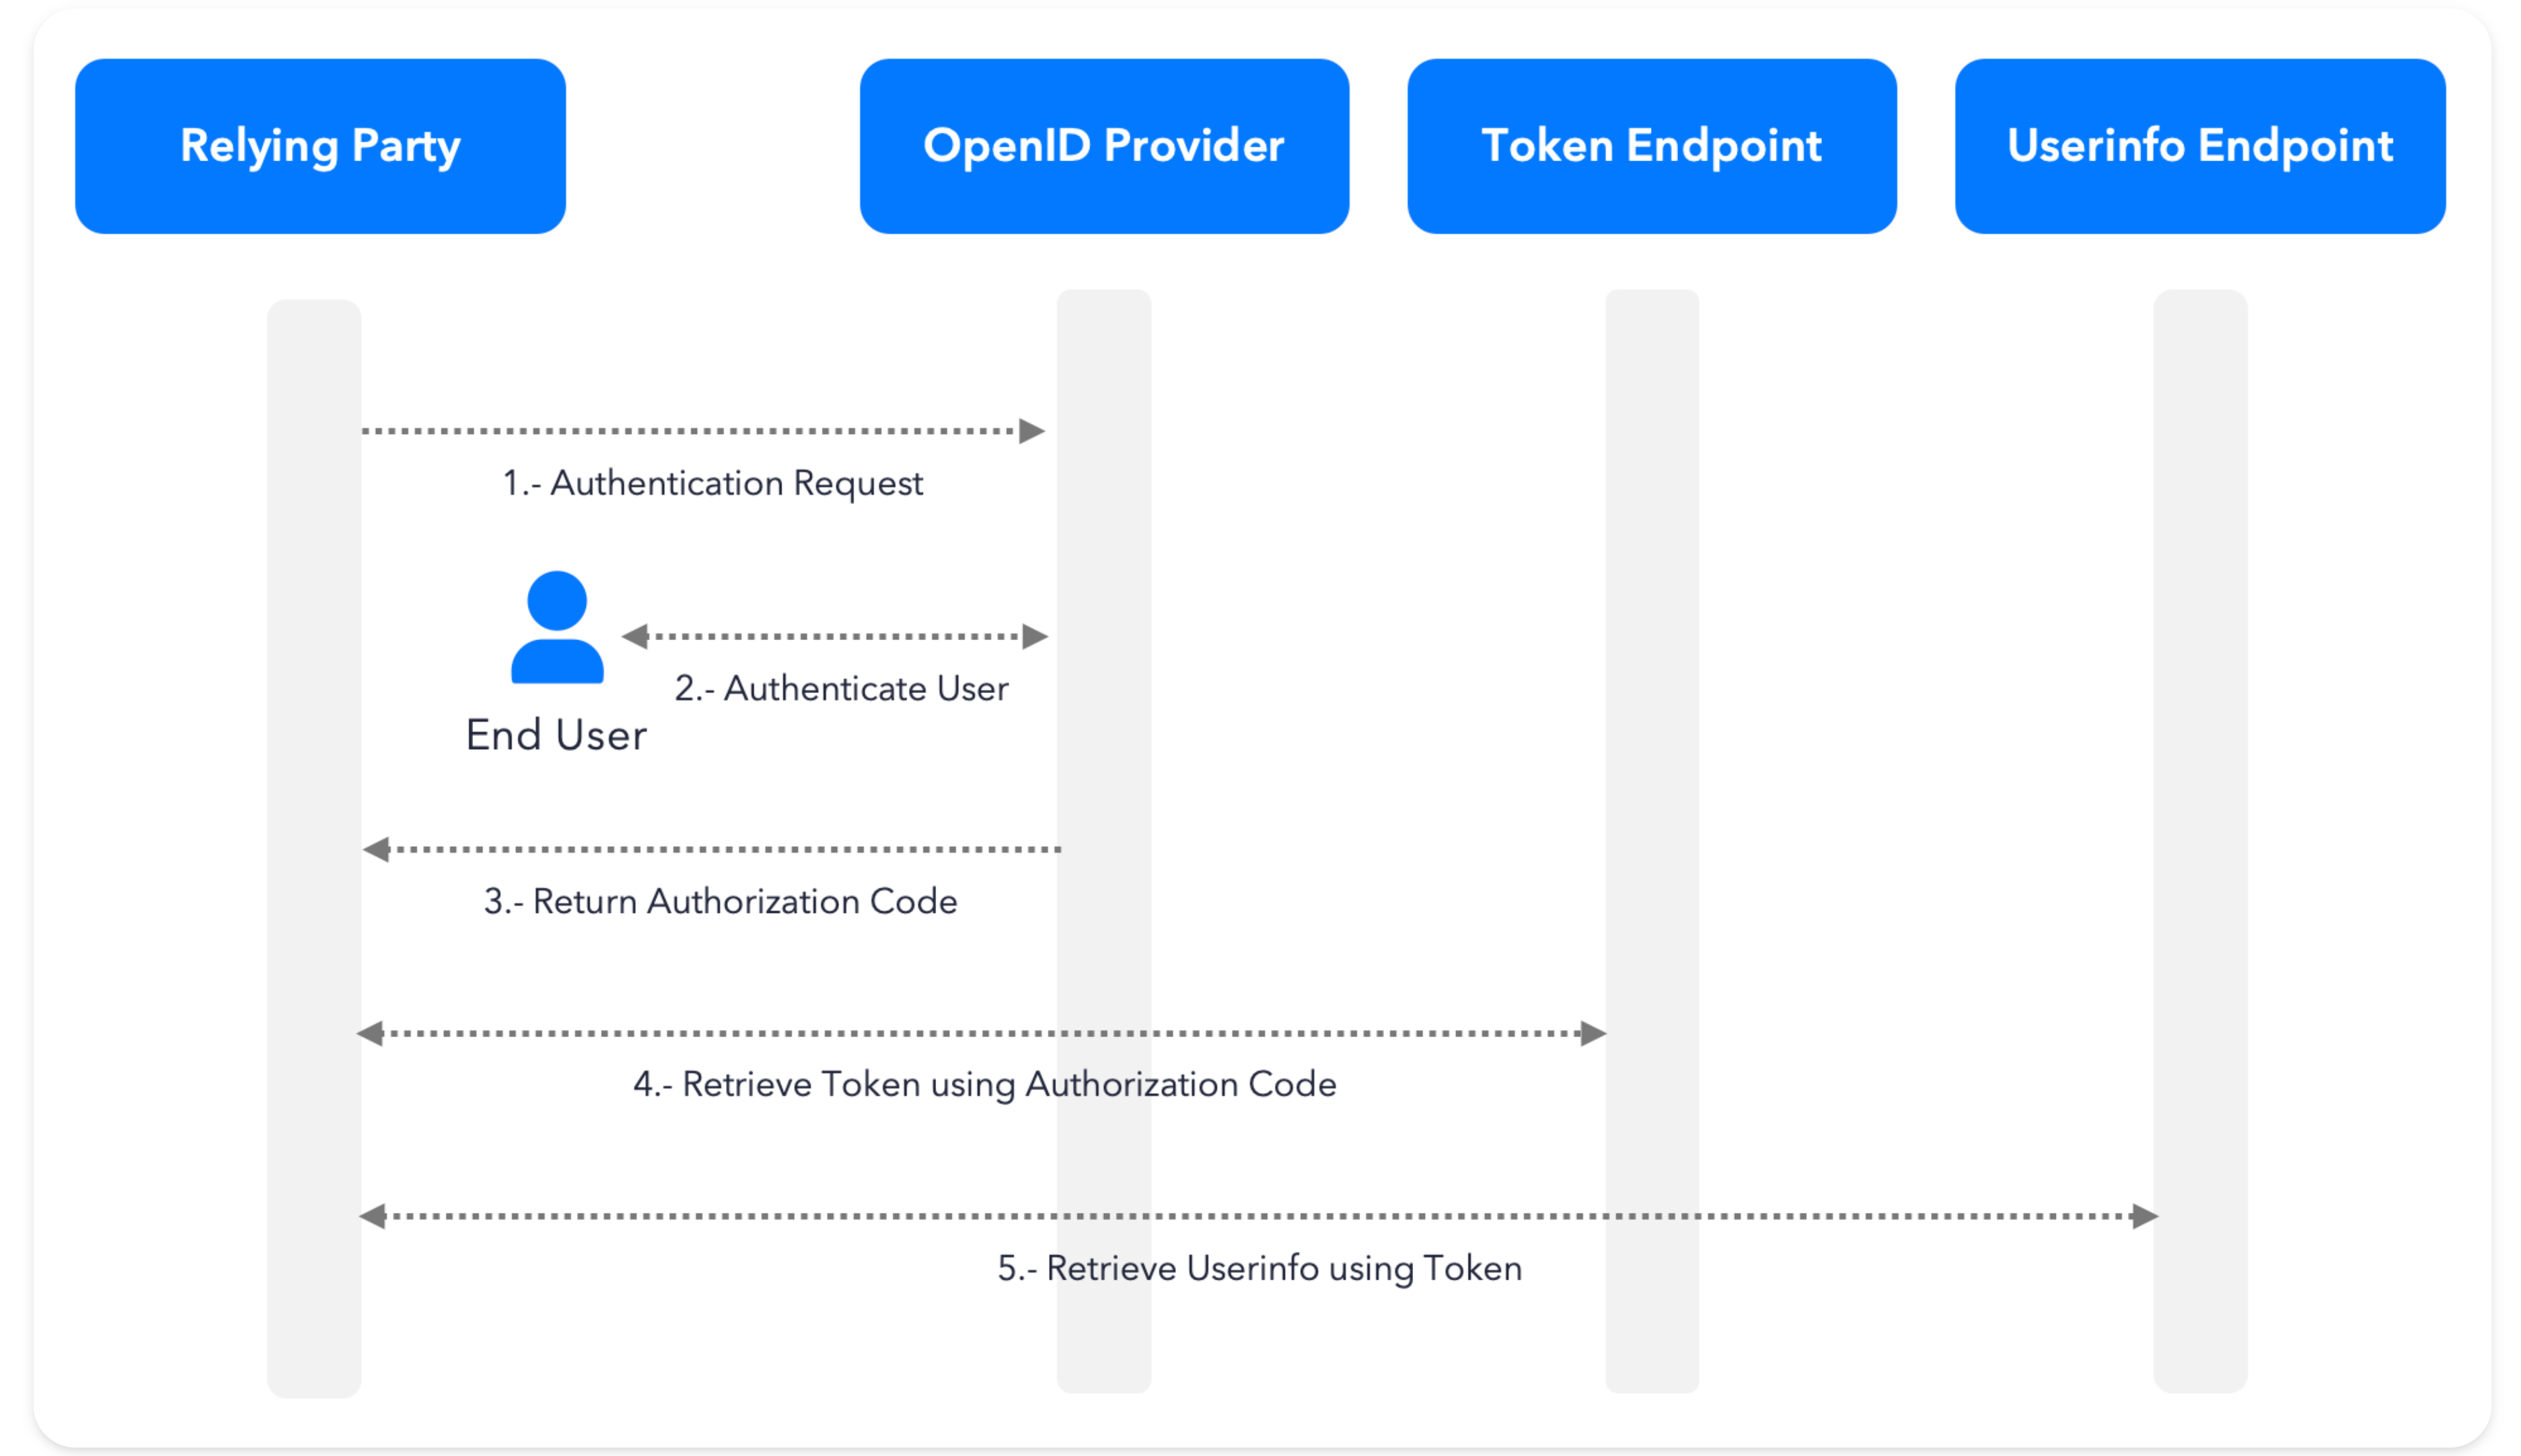
In practice, an OIDC authentication flow can be broken down into the following steps:
- A user completes an onboarding successfully and a new identity is created for that user.
- When the identity is created for the user at the time of onboarding, save the unique customer ID (also commonly referred to as an identity ID) to your database. The customer ID is returned in the
omni/get/scoreAPI response. - In the Incode dashboard, configure your OIDC authorization protocol. This can be found in the dashboard by navigating to
Configuration -> Authorization -> + Generate New. This part of the integration is technical and we highly recommend contacting your customer success team for assistance when you are ready. - In addition to configuring the OIDC authorization protocol, the client will need to create a redirect screen which needs to be hosted at your desired redirect URL. This is the page that a user will be redirected to after performing the authentication.
- To receive the authorization code from the Incode OIDC server, an endpoint must be created on the client's backend. Your customer success team can help advise on the creation of this endpoint.
- Once the backend architecture is in place, an authentication URL can be constructed to include the necessary OIDC parameters and the expected customer ID. Then this URL can be sent to an end user via the Incode SMS API to capture the selfie and initiate the OIDC handshake on the backend.
- Finally, once the 1:1 authentication is performed and the authorization code from the Incode OIDC server is received by the client, the client will send the authorization code and the client secret (stored in the client's backend) to Incode's token server. If the authorization code and client secret are validated by Incode's token server successfully, a bearer token will be returned to the client in the response. This bearer token completes the OIDC handshake and can be used to query secure user attributes (including their customer ID) from Incode via the user info endpoint. If the user information and customer ID returned from the OIDC process matches the expected customer ID submitted by the client, the authentication is a success. If a validation fails at any step in this process, the overall authentication will fail.
Conclusion
While this is a more technical integration than using static 1:N authentication links, this solution combines the security of OIDC and 1:1 facial authentication without requiring the user to submit information in addition to their selfie. For a detailed technical overview of this integration please contact your customer success team.
Updated 15 days ago