
[Legacy] Getting Started With Face Authentication
Overview of face authentication and how it can be used.
WarningThis method of Face Authentication is being deprecated in favor of an updated method that uses a Face Authentication module within Workflows and Flows. This change allows for a higher level of security and configurability when authenticating users.
Key dates:
- End of Support (EoS): October 1, 2026
- End of Life (EoL) / Retirement: April 1, 2027
We recommend completing your migration by January 1, 2027 to avoid any last-minute issues or service disruptions.
Documentation for the new method of Face Authentication can be found here:

Face authentication can provide an added level of security for organizations, applications, or even higher-level sections of application. For example, you could grant access to specific functionality within your application using face authentication. This would ensure the person requesting access has a valid, registered Incode Identity.
An Incode Identity is generated for every user who registers using the Incode onboarding process. Onboarding generates a unique identity for that user based on their biometric data. This Incode Identity can be used for further authentication, ensuring a secure and personalized experience.
Thorough understanding of Incode Identities is a prerequisite for face authentication.
How the face authentication process works
You can implement Incode face authentication by using either the Web or Mobile SDKs to enable a face recognition UI that asks the user for a selfie. This selfie image is then used for comparison using 1:N or 1:1 strategies.
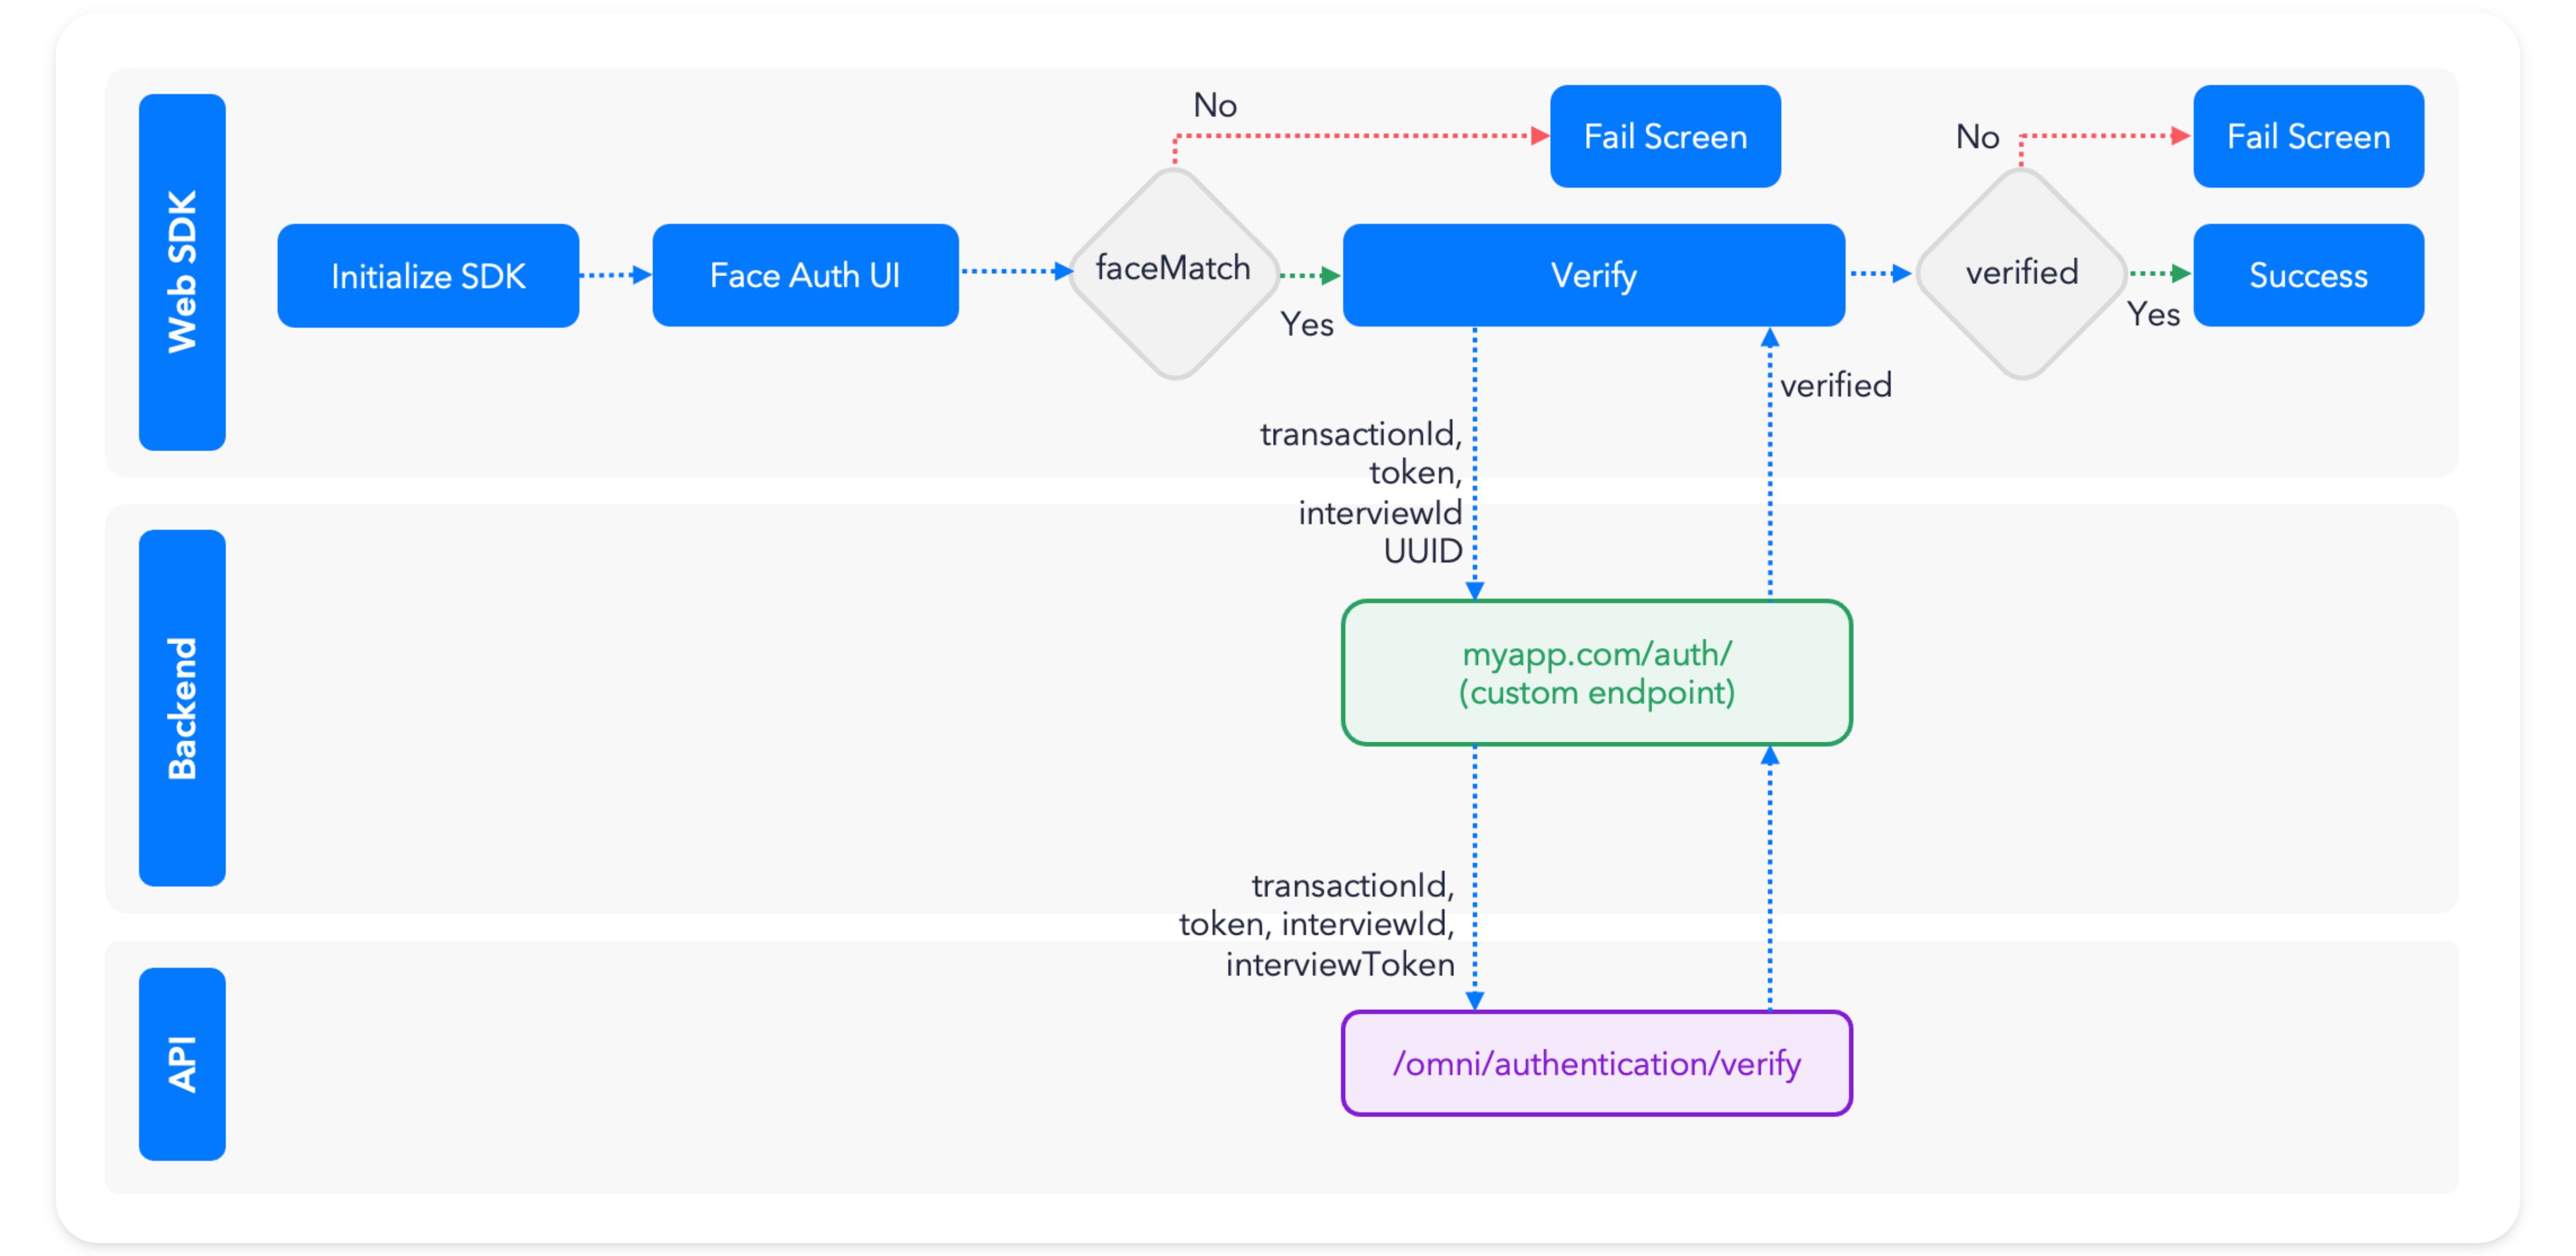
The basic face authentication steps are:
- Initialize the Incode SDK.
- Run the method.
- Based on the face capture, check to see if the user has a registered Incode Identity.
- If yes, validate the authentication using the
omni/authentication/verifyendpoint of the Incode Omni API - In your application back end, check whether Incode verified the authentication, and grant or deny access to the user.
The following diagram can help you visualize these steps.
Updated 4 months ago
What’s Next
Learn how to integrate Face Authentication using the Web or Mobile SDKs