
Create an Onboarding Session
Overview of how to create a new session using the Incode API
Considerations
- You must include a
flowIdfrom a previously created Incode Flow when you start an onboarding session. This ID links the new session to a specific flow. The configurations and thresholds for that Flow are used when the verifications are executed by the Incode APIs. - Onboarding Sessions must be created in your application back end (never directly from the front-end application) using the Incode API, specifically the
/omni/startendpoint. - You must create a new onboarding session every time an onboarding attempt is executed, even if it is related to the same user. This requirement preserves session integrity and improves performance analytics.
Session creation
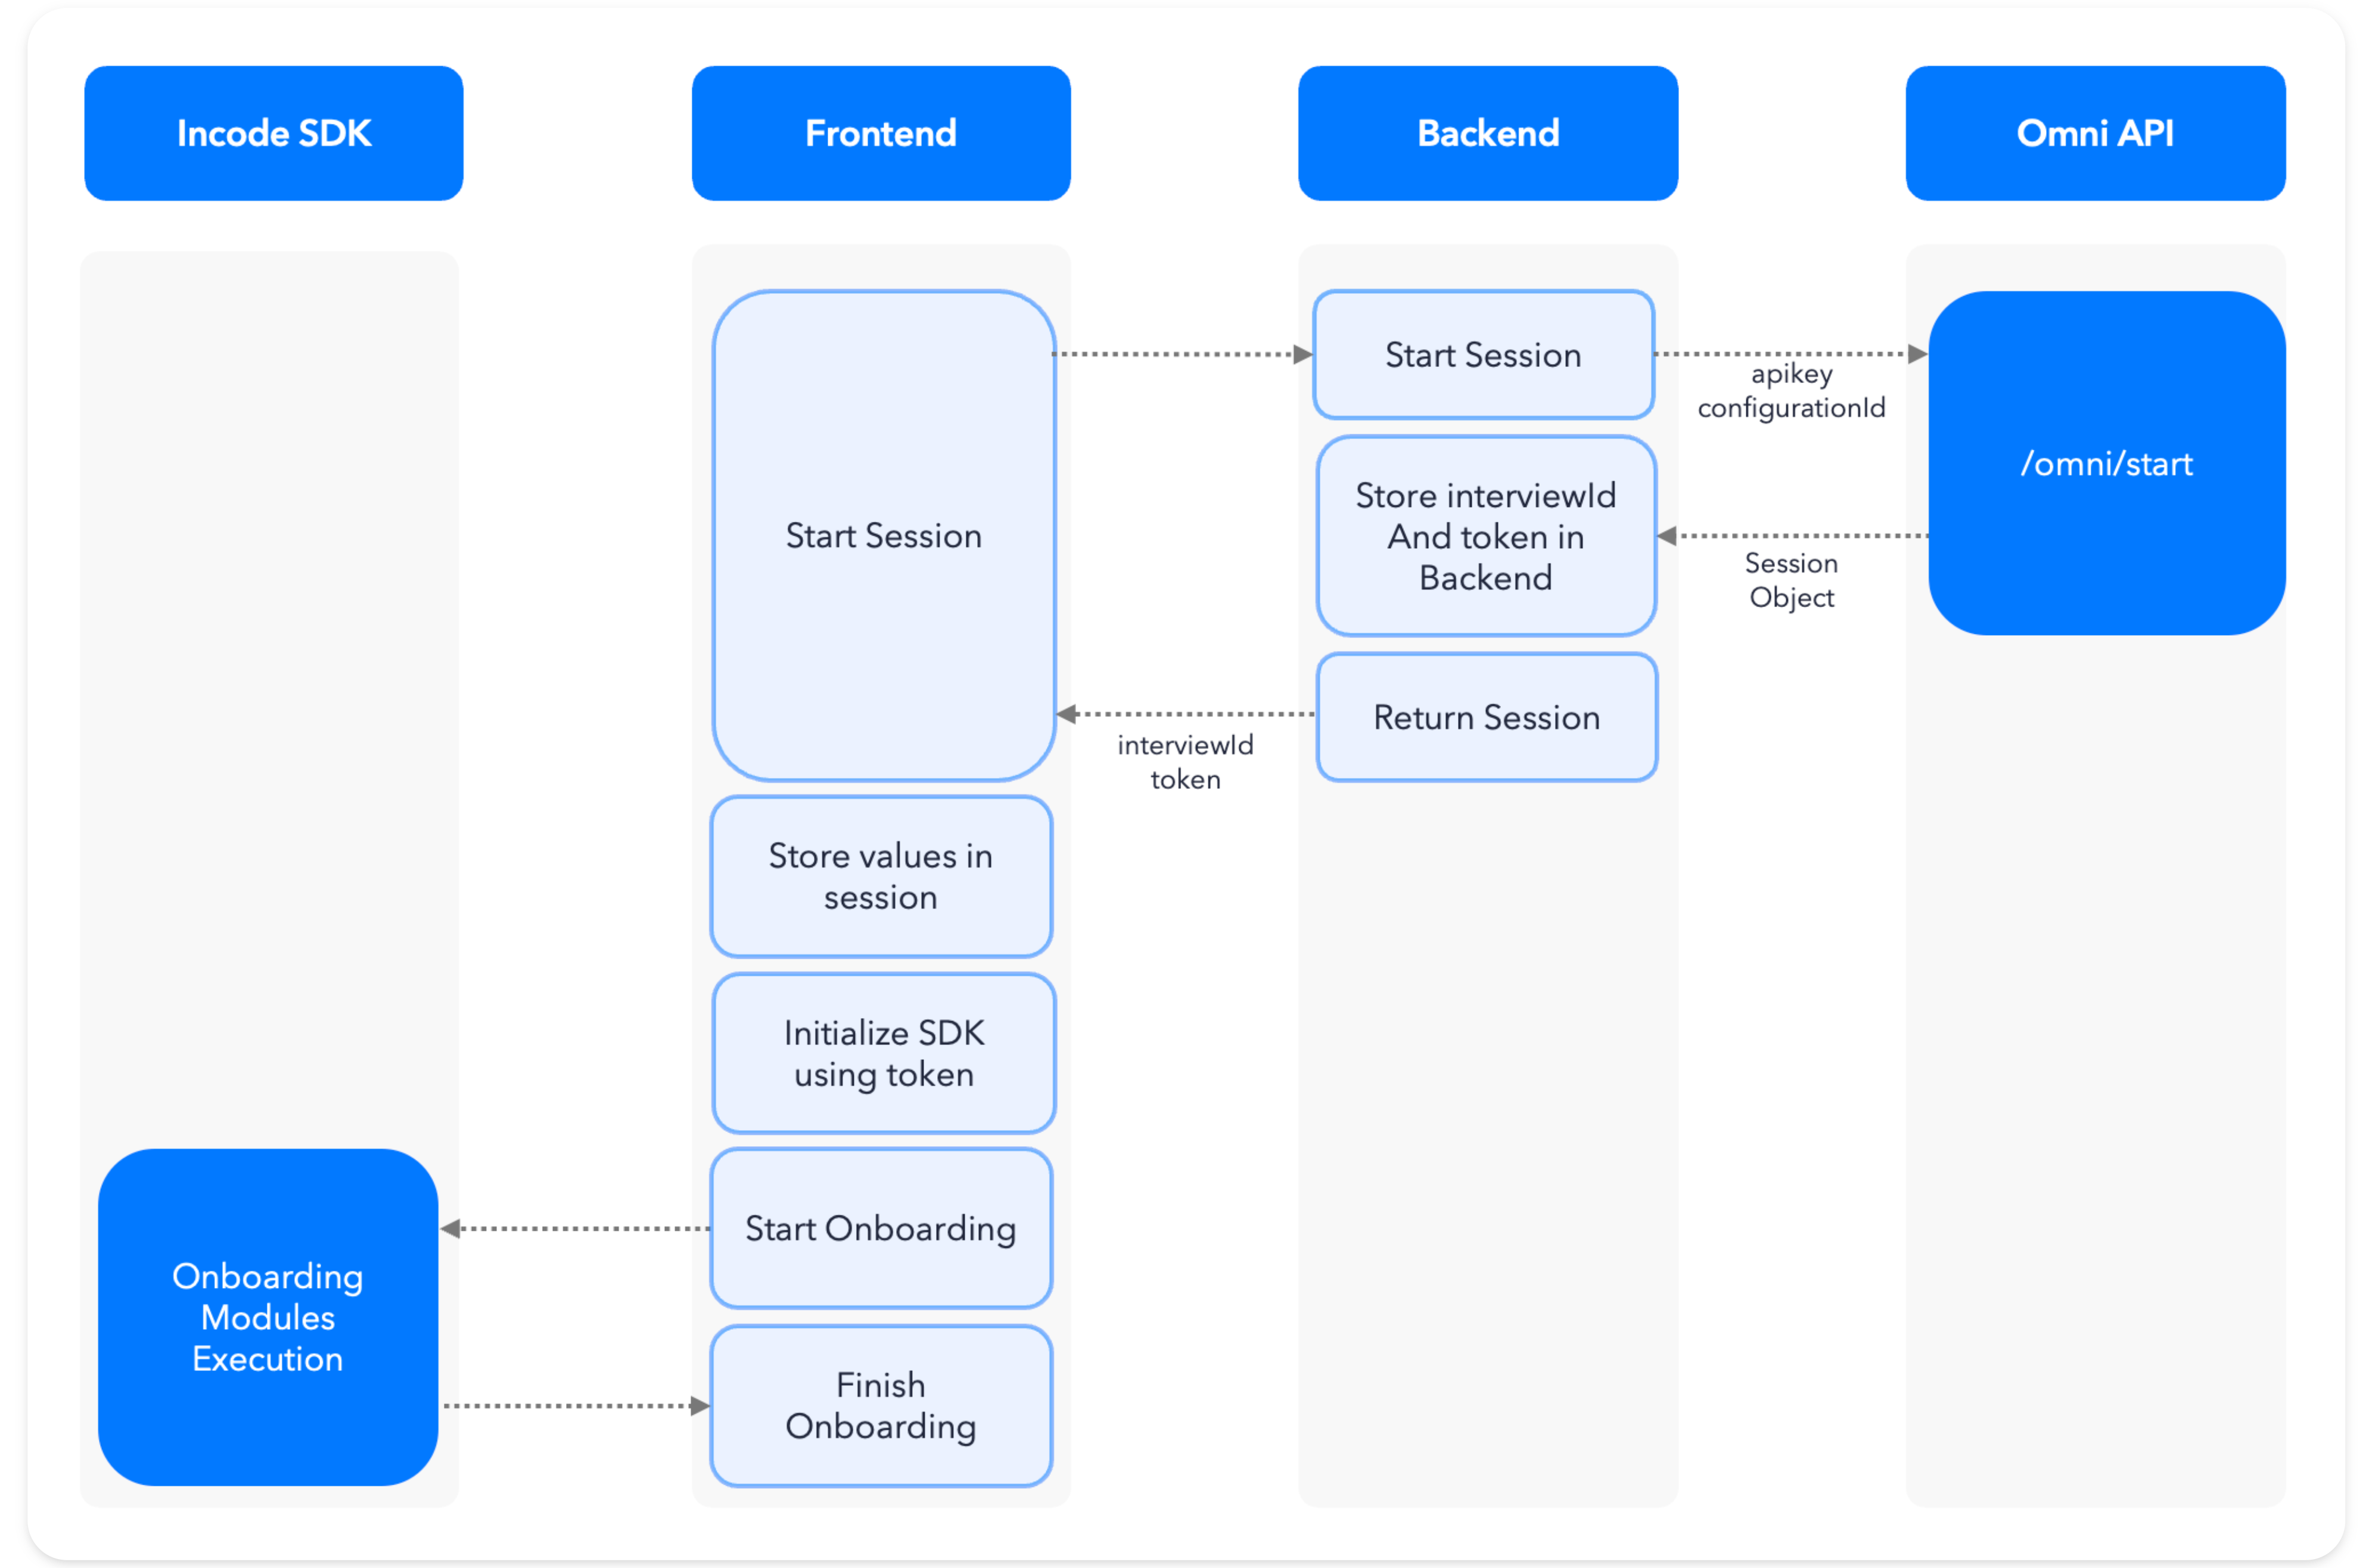
The following diagram shows the initial steps that happen your application, both front and back end. Once your application requests a session start, the Omni API is invoked with the /omni/start endpoint.
The /omni/start endpoint
/omni/start endpointThis endpoint is responsible for creating new Incode sessions. It returns a JSON response that contains metadata about the newly created session.
Check the start onboarding documentation for a complete reference of the endpoint's inputs and output.
/omni/start requests
/omni/start requestsThis request uses the following header values and body key/value pairs:
Headers
| Header | Value |
|---|---|
api-version | "1.0" |
x-api-key | The API Key provided to you by Incode |
JSON Request Body
| Key | Value |
|---|---|
configurationId | The Incode Flow identifier, also referred to as the Flow ID, for your new sessions. If you don't know the Flow ID, open Dashboard > Flows, locate the Flow you want to reference, and click Copy Flow ID in the Actions column. |
externalCustomerId | Optional: ID that links the new onboarding session to a specific ID you provide. You can query all the sessions related to this ID on the Incode Dashboard. For example, you may have assigned an ID to the customer in another system and want to be able to find all sessions related to that customer ID. |
redirectiontUrl | Optional: Used with /omni/onboarding-url to redirect to this URL at the end of the flow. You can also configure this on the Incode Dashboard. |
curl --location '{user.DEMO_URL}omni/start' \
--header 'Accept: application/json' \
--header 'Content-Type: application/json' \
--header 'api-version: 1.0' \
--header 'x-api-key: <<APIKEY>>' \
--data '{
	"countryCode": "ALL",
    "configurationId": "65283accd410a1dd7e965479",
    "externalCustomerId": "someuser0001",
    "redirectionUrl": "http://example.com/"
}'
const params = {
configurationId: <<flowId>,
countryCode: "ALL",
language: "en-US",
//externalCustomerId: "someuser0001", //The Id if the user in your system
//redirectionUrl: "http://example.com/", //The url where the user will be redirected at the end of the onboarding
};
const headers = {
accept: 'application/json',
'content-type': 'application/json',
'x-api-key': '<<APIKEY>>',
'api-version': '1.0'
};
const options = {
method: 'POST',
headers: headers,
body: JSON.stringify(params)
};
const response = await fetch('{user.DEMO_URL}omni/start', options);
const {token, interviewId} = response.json();Handling the /omni/start response
/omni/start responseYour application back-end must process the response, which returns multiple values. The following values are specifically needed for your web application.
The interviewId
interviewIdA unique interviewId string (or Session ID) is assigned when a new session is created. Store each interviewId you create in your application back end.
The session token
tokenThe Web SDK needs a valid session token to communicate with the Incode API. The /omni/start response returns a new token value each time you create a new session. This JSON Web Token is used to call the Omni APIs required as part of the onboarding process. Learn more about Session Tokens here ↗.
Send back only the token and the interviewId to the front end. These are the only keys to the omni/start response, and the SDKs need these values to work with the Incode Omni API.
Updated about 1 month ago
Congrats! Now, you know how to create and handle new onboarding sessions.