
ID Capture
Overview of the ID Capture module.
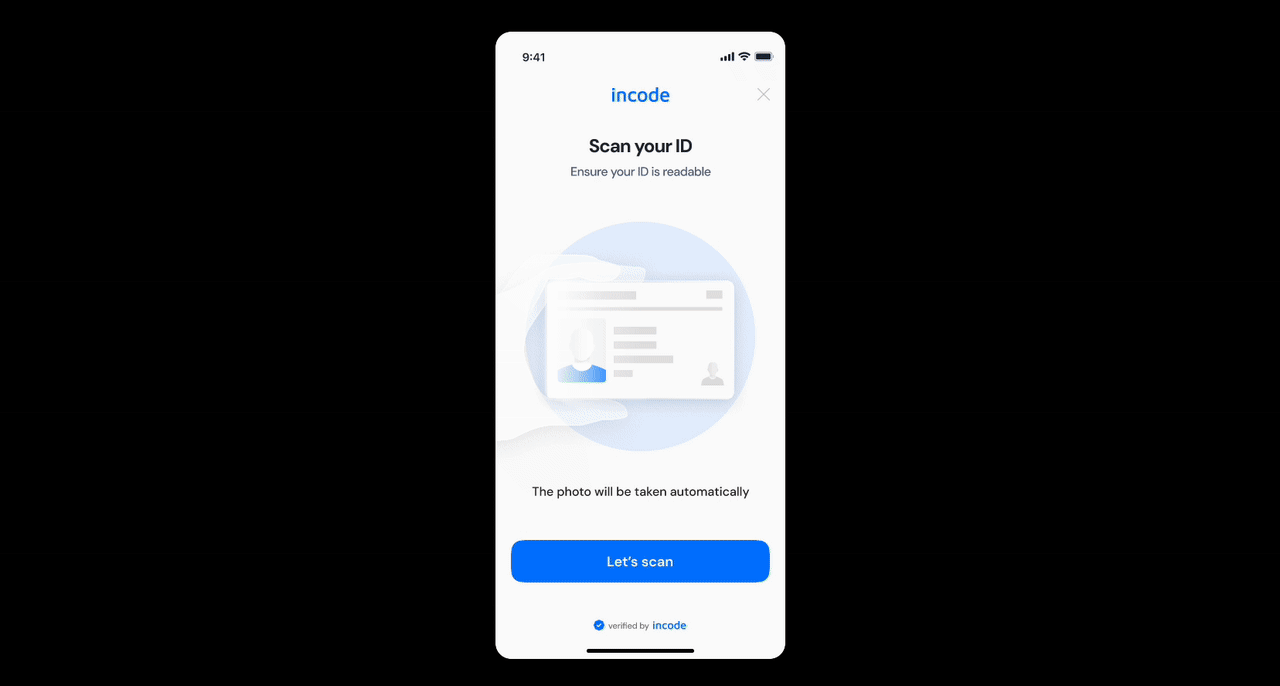
ID Capture is a core onboarding step. It collects high-quality images of a user’s government-issued ID. For two-sided IDs, both the front and back are captured. The module also extracts data using optical character recognition (OCR) and runs authenticity checks.
Where it fits in the flow
In an onboarding flow or workflow, ID Capture usually appears immediately after consent and document type selection and before Selfie Capture and final submission.
Once the user provides valid images, the flow continues to data extraction, document liveness/authenticity checks, and any downstream logic (such as Face Match with later selfie).
User experience flow
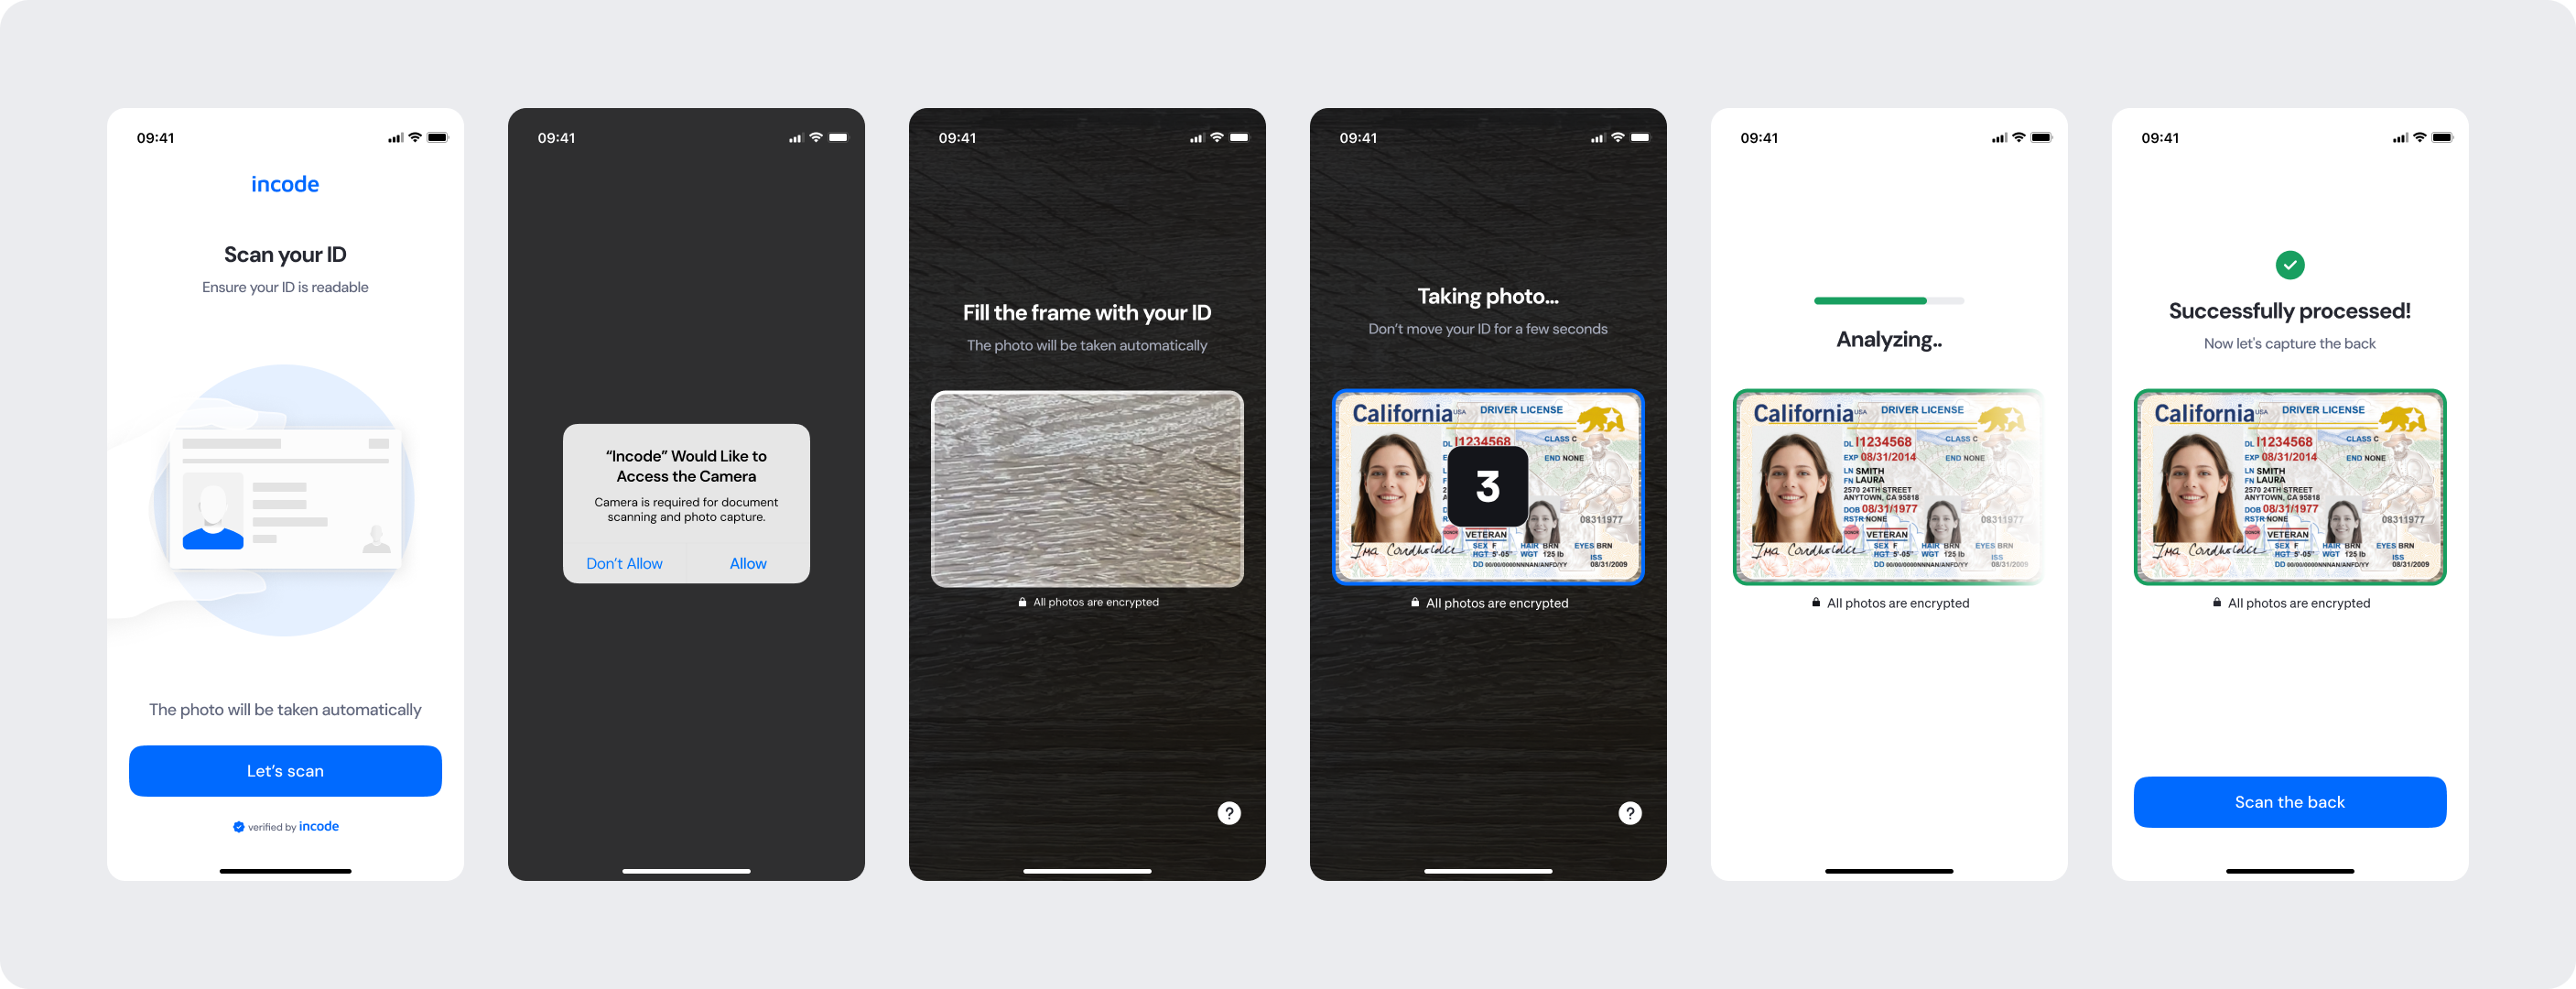
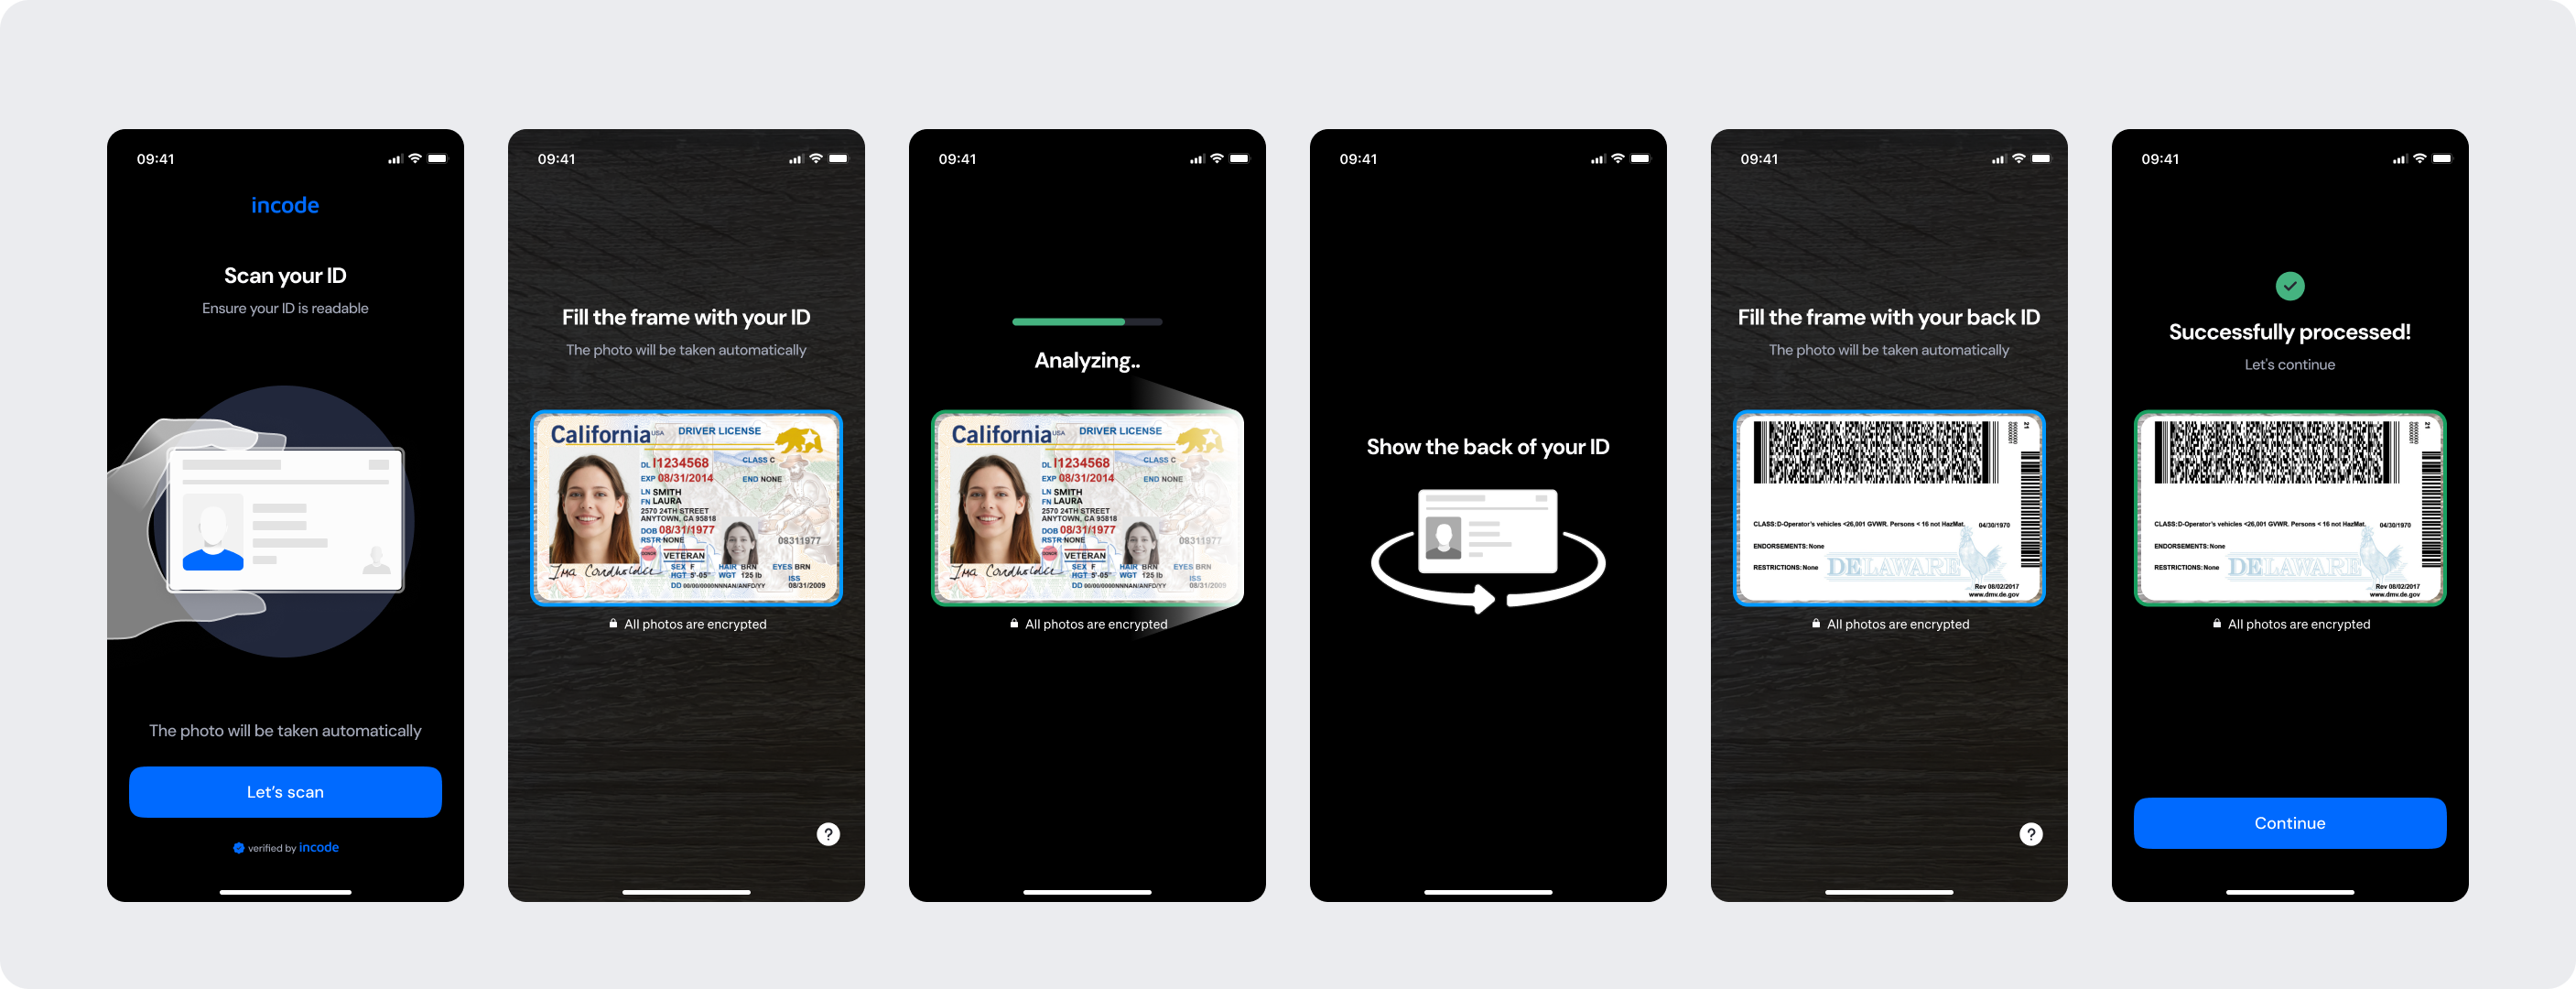
The experience guides users from preparation to a successful ID capture. After granting camera permission, users see a short tutorial. During capture, the system evaluates framing, glare, blur, and edge alignment in real time. When requirements are met, the ID is auto-captured. If auto-capture doesn’t trigger in time, manual capture is available. In this case, images are then uploaded for quality checks with retry options on failure.
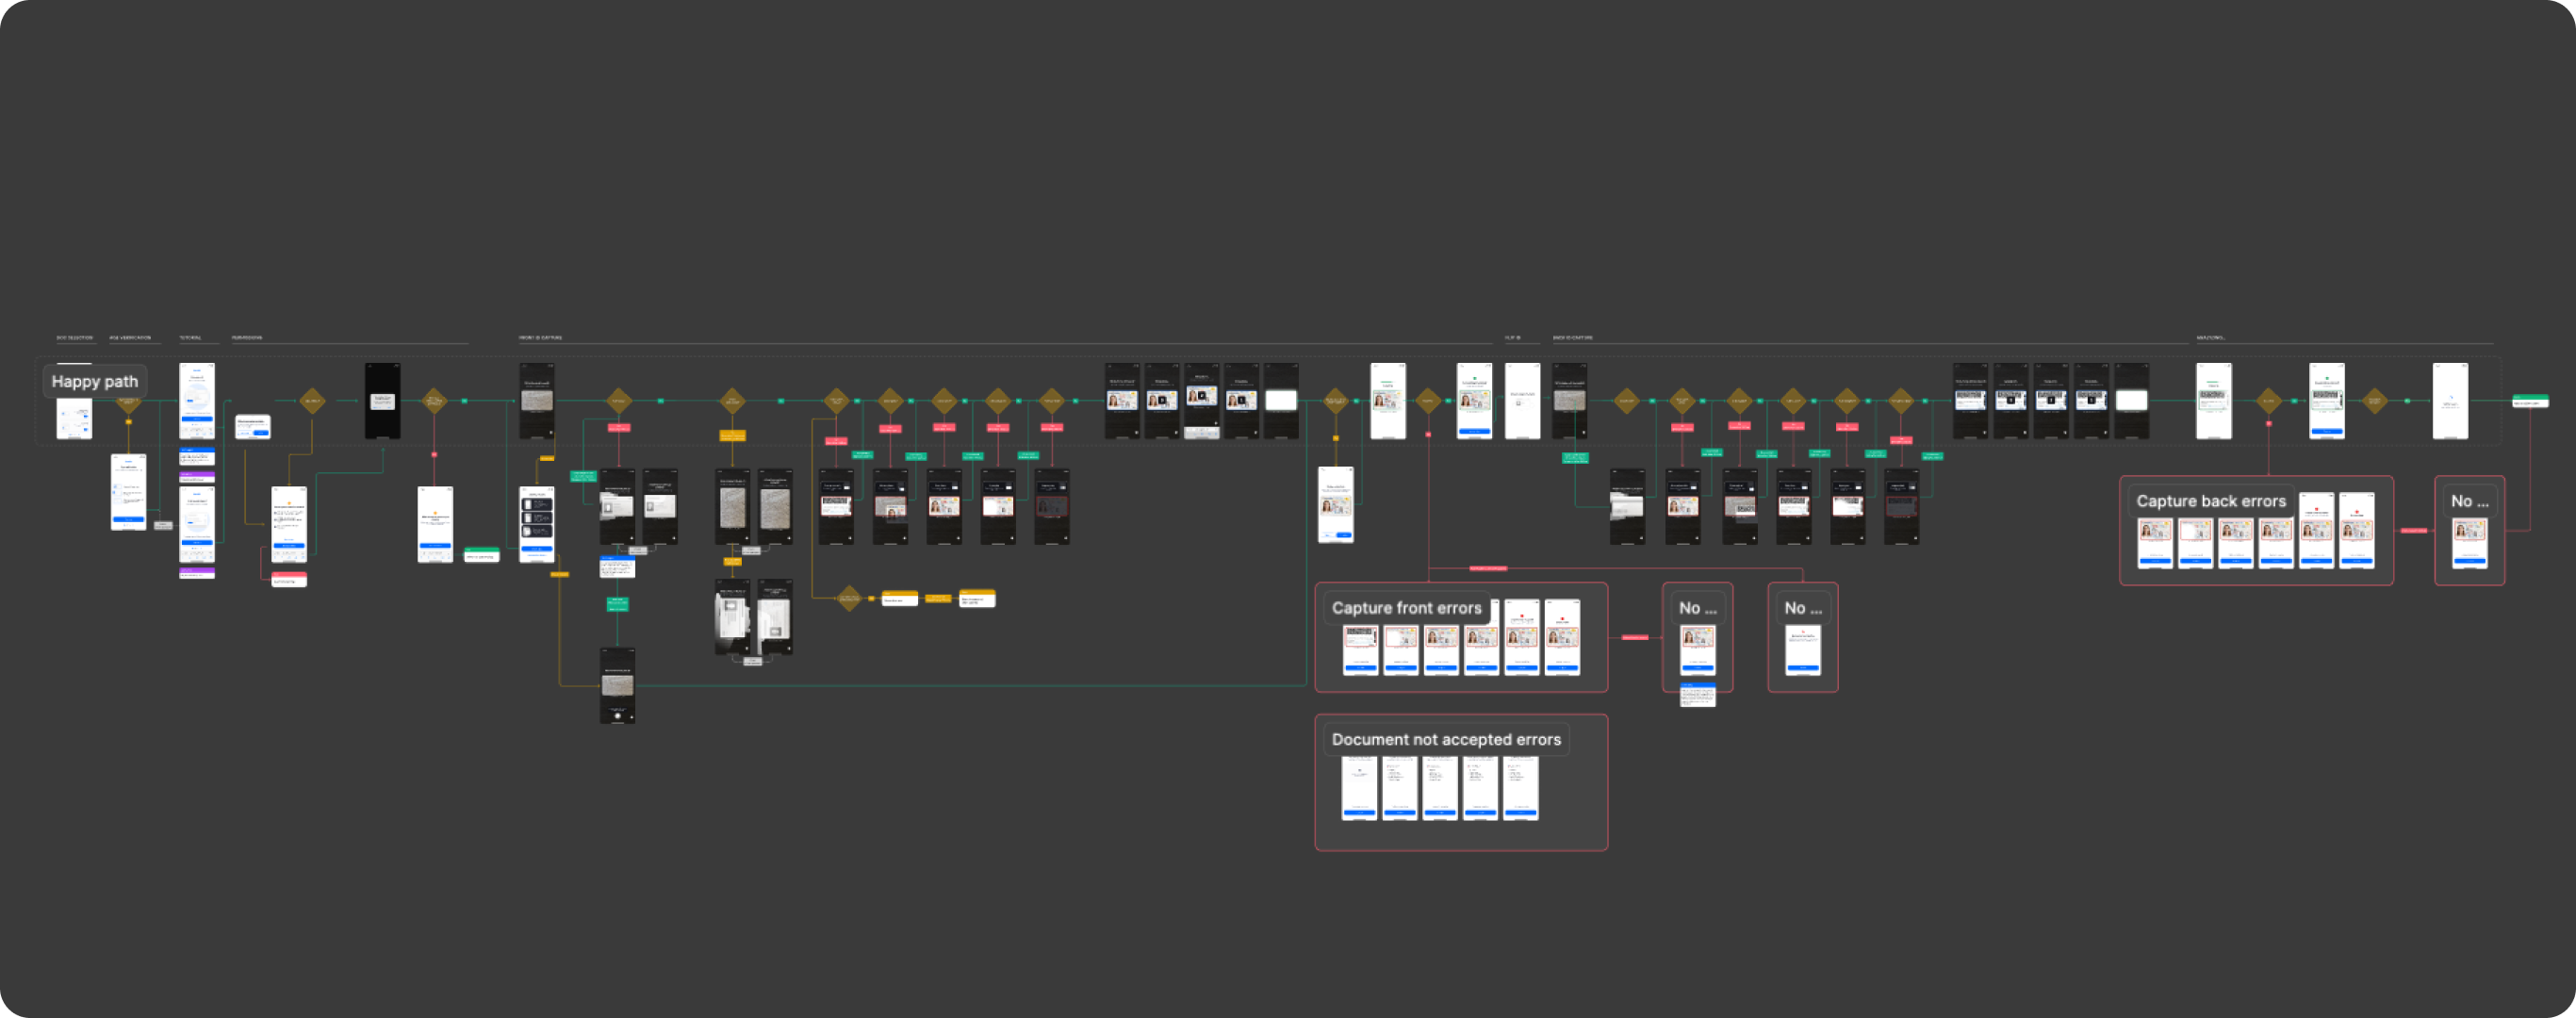
Full Flow Map
This diagram shows all ID Capture screens, from tutorial and permissions through front/back auto/manual capture, uploading, and feedback (success/error).
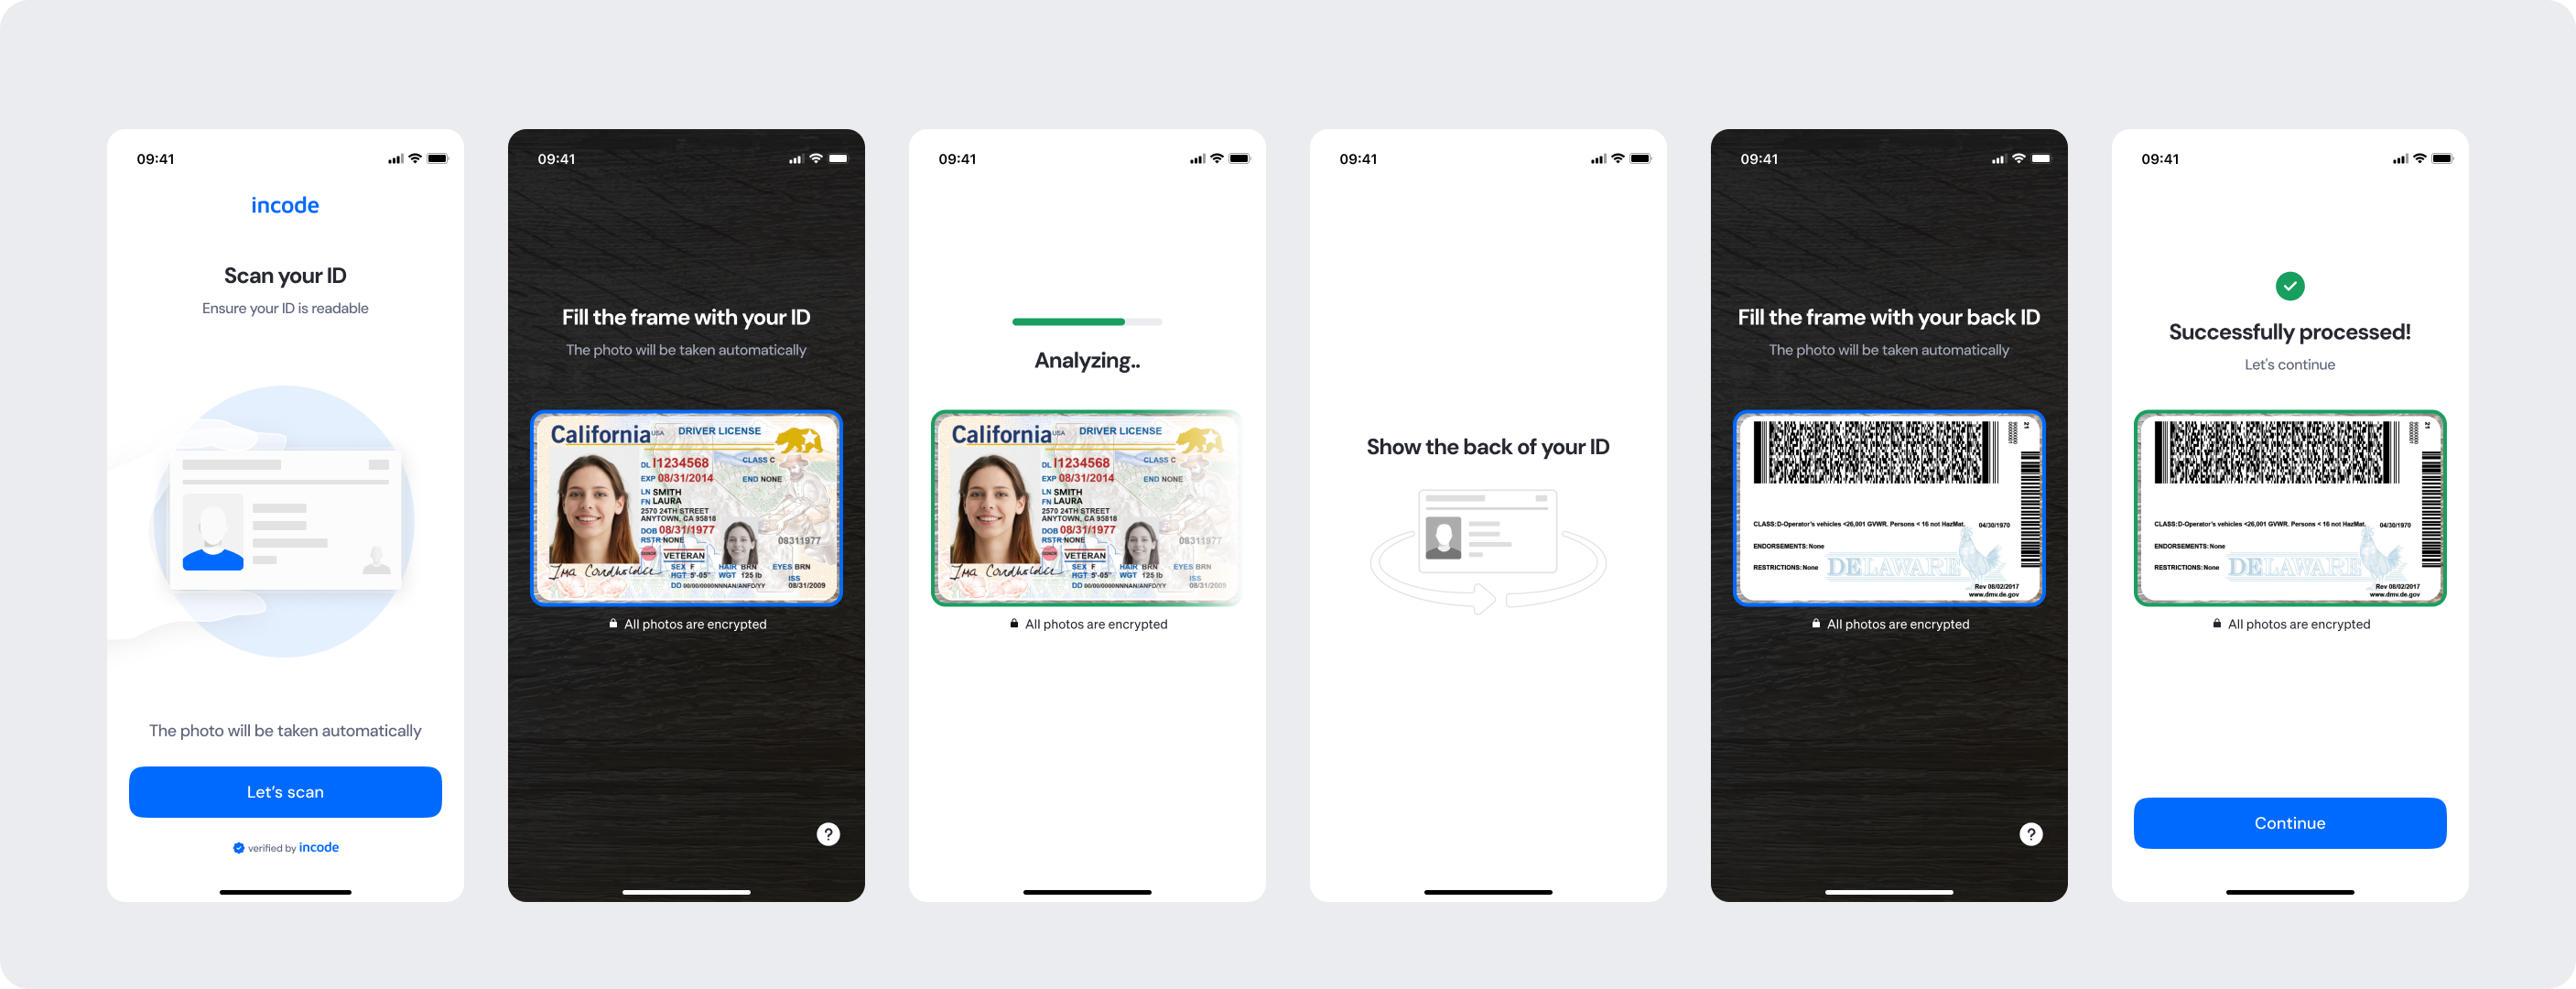
Happy Path (Light & Dark)
The ideal user journey occurs when the ID is captured successfully with no interruptions.
The happy path represents the smoothest version of the experience:
- The user grants camera access
- The user follows the tutorial
- The system detects proper alignment and lighting
- The ID is captured automatically without requiring retries or manual intervention.
In these images, both light and dark mode previews are included so teams can validate visual consistency across themes.
Light mode
Dark mode
Best practices for design and implementation
✅ Do
- Keep instructions short and actionable (for example, “Place your ID on a flat surface. Avoid glare”).
- Use a high-contrast, uncluttered background. Ensure text remains readable.
- Guide with real-time feedback, like, “Move closer,” “Avoid glare,” or “Show all corners.”
- Provide retry options and clear error messages (for example, “Wrong document side”).
- Respect accessibility with voiceover labels, adequate tap targets, and captions.
❌ Don’t
- Don’t reduce overlay opacity so much that the capturing frame edges become hard to see
- Don’t rely solely on color for status. Add icons/text.
- Don’t skip critical error states like glare, blur, or cut-off).
- Don’t let UI elements obstruct the camera area.
Updated 3 months ago