
Ping DaVinci
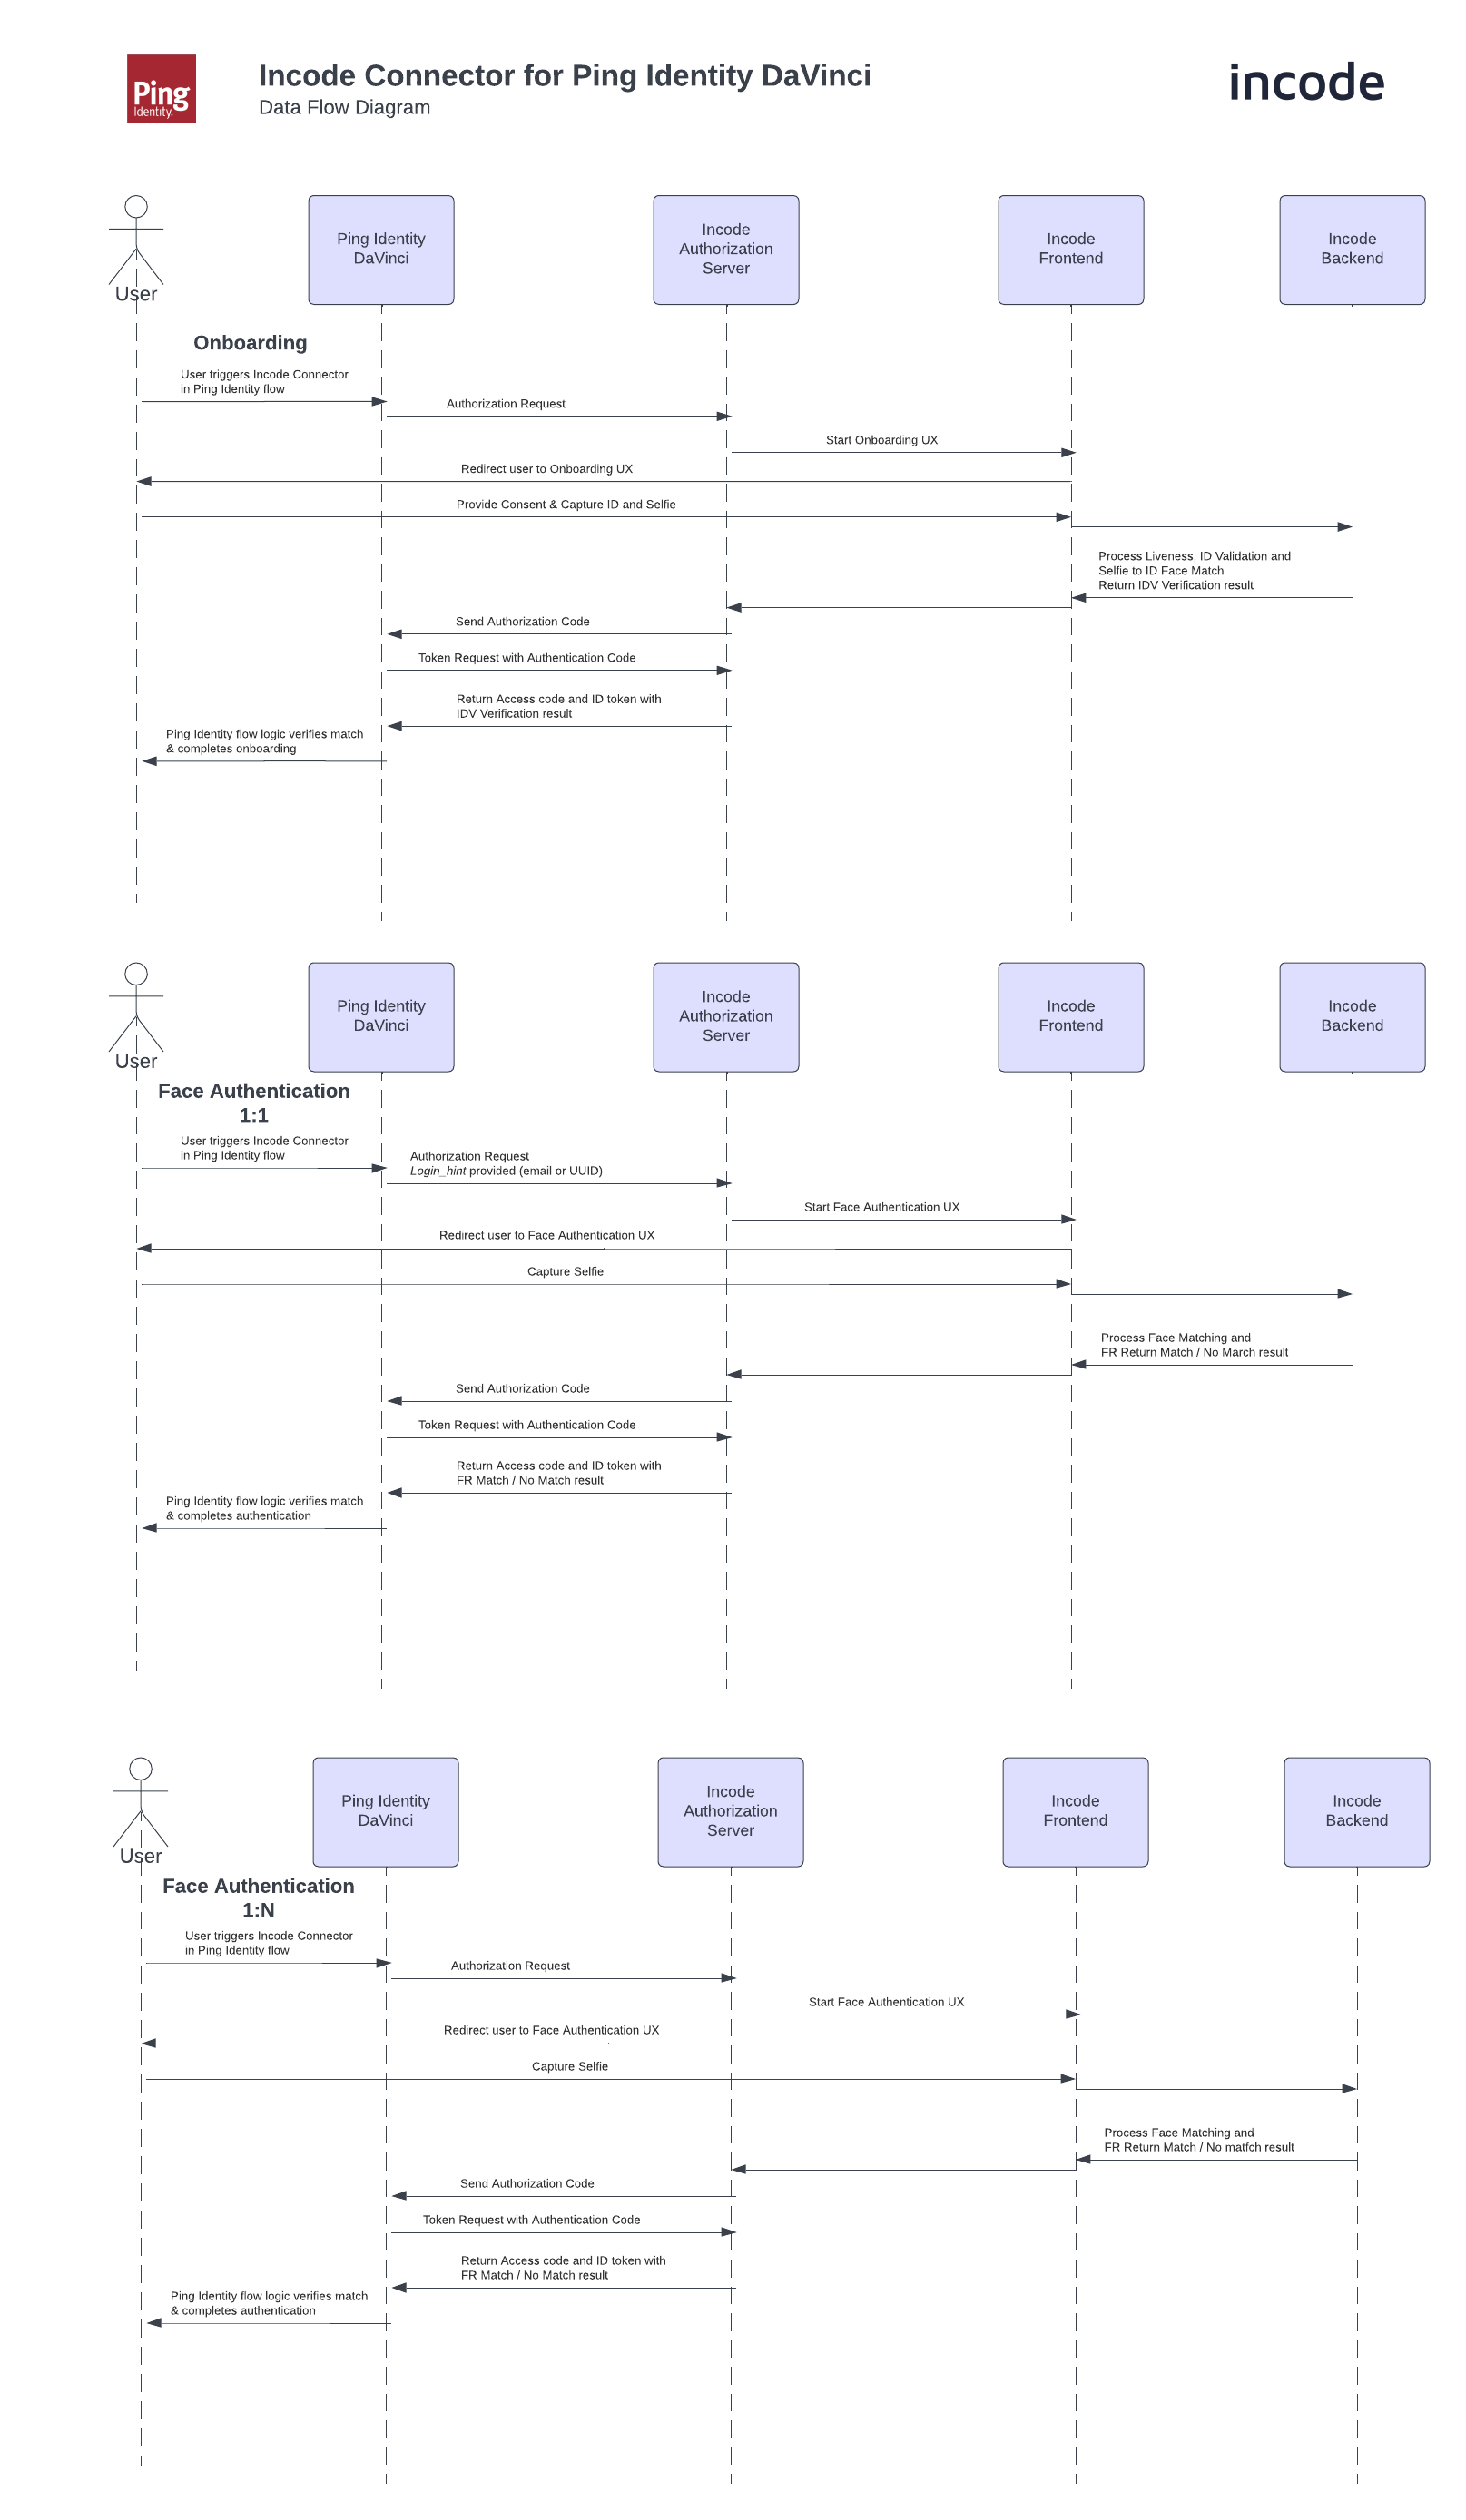
You can integrate Incode identity verification (IDV) into your PingOne DaVinci flows using the Incode DaVinci Connector. The connector connects verified real-world identities to Ping Identity user profiles through OpenID Connect (OIDC), enabling identity verification and face authentication as drag-and-drop nodes in DaVinci orchestration flows.
The Incode DaVinci connector is published in the Ping Identity Marketplace and supports both customer identity (CIAM) and workforce identity (IAM) use cases.
Prerequisites
Ensure you have the following before you begin:
- A PingOne DaVinci environment with permission to add connectors.
- Access to the Integrations page in Dashboard. Contact your Incode Representative if you do not see it.
- An Incode Standard Workflow configured for your verification use case.
Integration Flow
- A user reaches the Incode Connector node in your DaVinci flow.
- DaVinci redirects the user to Incode using OIDC.
- The user completes identity verification on their device: ID document capture, liveness detection, and face match.
- Incode redirects the user back to DaVinci with an authorization code and ID token containing verification claims.
- After Incode has verified a user's real-world identity, face authentication can be enabled to confirm their identity in subsequent flows.
Supported Use Cases
- User registration: Verify real-world identity as part of new user registration and create the Ping Identity user profile with verified claims.
- Account recovery: Verify identity before granting account access during recovery flows.
- Password resets: Gate password resets behind biometric verification.
- Conditional step-up: Trigger identity verification as an additional authentication factor when risk signals are detected.
Set Up the DaVinci Integration
Create the OIDC integration in Dashboard
- Log in to Dashboard.
- In the left menu, click Integrations.
- Click New Integration.
- From the Custom tab, select OIDC, then click Continue.
- Enter a Name for this integration: for example,
Ping DaVinci. - Configure the Redirect URI: this must match the Redirect URI in your Ping DaVinci connector configuration.
- Select a Workflow for this integration from the drop-down.
- Click Save. A client ID and client secret are generated.
NoteThe client secret is shown only once. Store it securely before navigating away from this screen.
Add the Incode Connector in DaVinci
In DaVinci, add an Incode connection. For help, see the Ping documentation on Adding a connection.
Configure the connector with the following values:
| Field | Value |
|---|---|
| App ID | The client ID from the Incode OIDC client configuration |
| Client Secret | The client secret from the Incode OIDC client configuration |
| Issuer URL | The Issuer URL for Incode's authorization server, provided by Incode |
| Scope | List of space-separated scopes—must match exactly those configured in the Incode OIDC client configuration |
Add the Connector Node to Your Flow
Place the Incode Connector node at the point in your DaVinci flow where identity verification should occur. This is typically during new user registration, so the Ping Identity user profile is created with verified claims.
Enable Face Authentication
After a user has been onboarded with Incode, you can use the connector's face authentication capability in subsequent flows to verify the user's real-world identity without another document capture.
Troubleshooting
Redirect URI Mismatch
Confirm that the Redirect URI in the Incode OIDC client configuration exactly matches the Redirect URI within the Incode Ping DaVinci connector configuration.
Environment Mismatch
Confirm with your Incode Representative that your account is provisioned in the correct environment for the Issuer URL in your connector configuration.
Additional Resources
- Incode DaVinci Connector on Ping Identity Marketplace
- Incode DaVinci Connector documentation
- PingOne DaVinci Connector Library
Updated about 2 months ago