
Okta IDV Standard
The Okta IDV Standard integration adds Incode biometric identity verification as a native step within Okta authentication policies. Using the Okta Identity Verification Standard, Incode is registered as a third-party identity verification provider directly in Okta, no custom redirects or middleware required.
After you configure the integration, Okta can invoke an Incode verification session at any point in an authentication policy: during account recovery, MFA reset, step-up authentication, or high-assurance sign-in flows. The verified result is returned to Okta and used to allow or block the user from completing the flow.
This integration is listed on the Okta Integration Network (OIN).
Okta IDV Standard vs. Okta IDPThe Okta IDV Standard integration uses Okta's native Identity Verification Standard protocol to invoke Incode from within an Okta authentication policy. The Okta IDP integration configures Incode as a full identity provider and authenticator for your Okta organization. Both can be used independently or together depending
on your use case.
Prerequisites
Ensure you have the following before you begin:
- Access to the Integrations page in Dashboard. Contact your Incode representative if you do not see it.
- A Workflow created for this integration.
- An Okta Identity Engine (OIE) instance.
- An Okta administrator account with permissions to add and modify Identity Providers and Authentication Policies.
- The Identity verification with third-party identity verification vendors Early Access feature enabled on your Okta instance.
TipTo enable this feature, go to your Okta Admin Console > Settings > Features and search for "Identity verification with third-party identity verification vendors". Enable it. If the feature is not visible, contact Okta support to request access.
What This Integration Enables
After it's configured, you can use the Okta IDV Standard integration to add Incode verification to the following flows:
- Account resets and recovery: Verify a user's identity before allowing a password reset or account unlock. See Account resets & recovery.
- Passwordless sign-in: Gate high-assurance sign-in steps with biometric verification. See Passwordless sign-in.
- Custom claims matching: Configure which identity attributes are matched against your Okta directory during verification. See Configure claims matching.
Set Up Okta IDV Standard Integration
Create the Integration in Dashboard
- Log in to Dashboard.
- In the left menu, click Integrations.
- Click New Integration.
- From the IAM tab, select Okta IDV Standard, then click Continue.
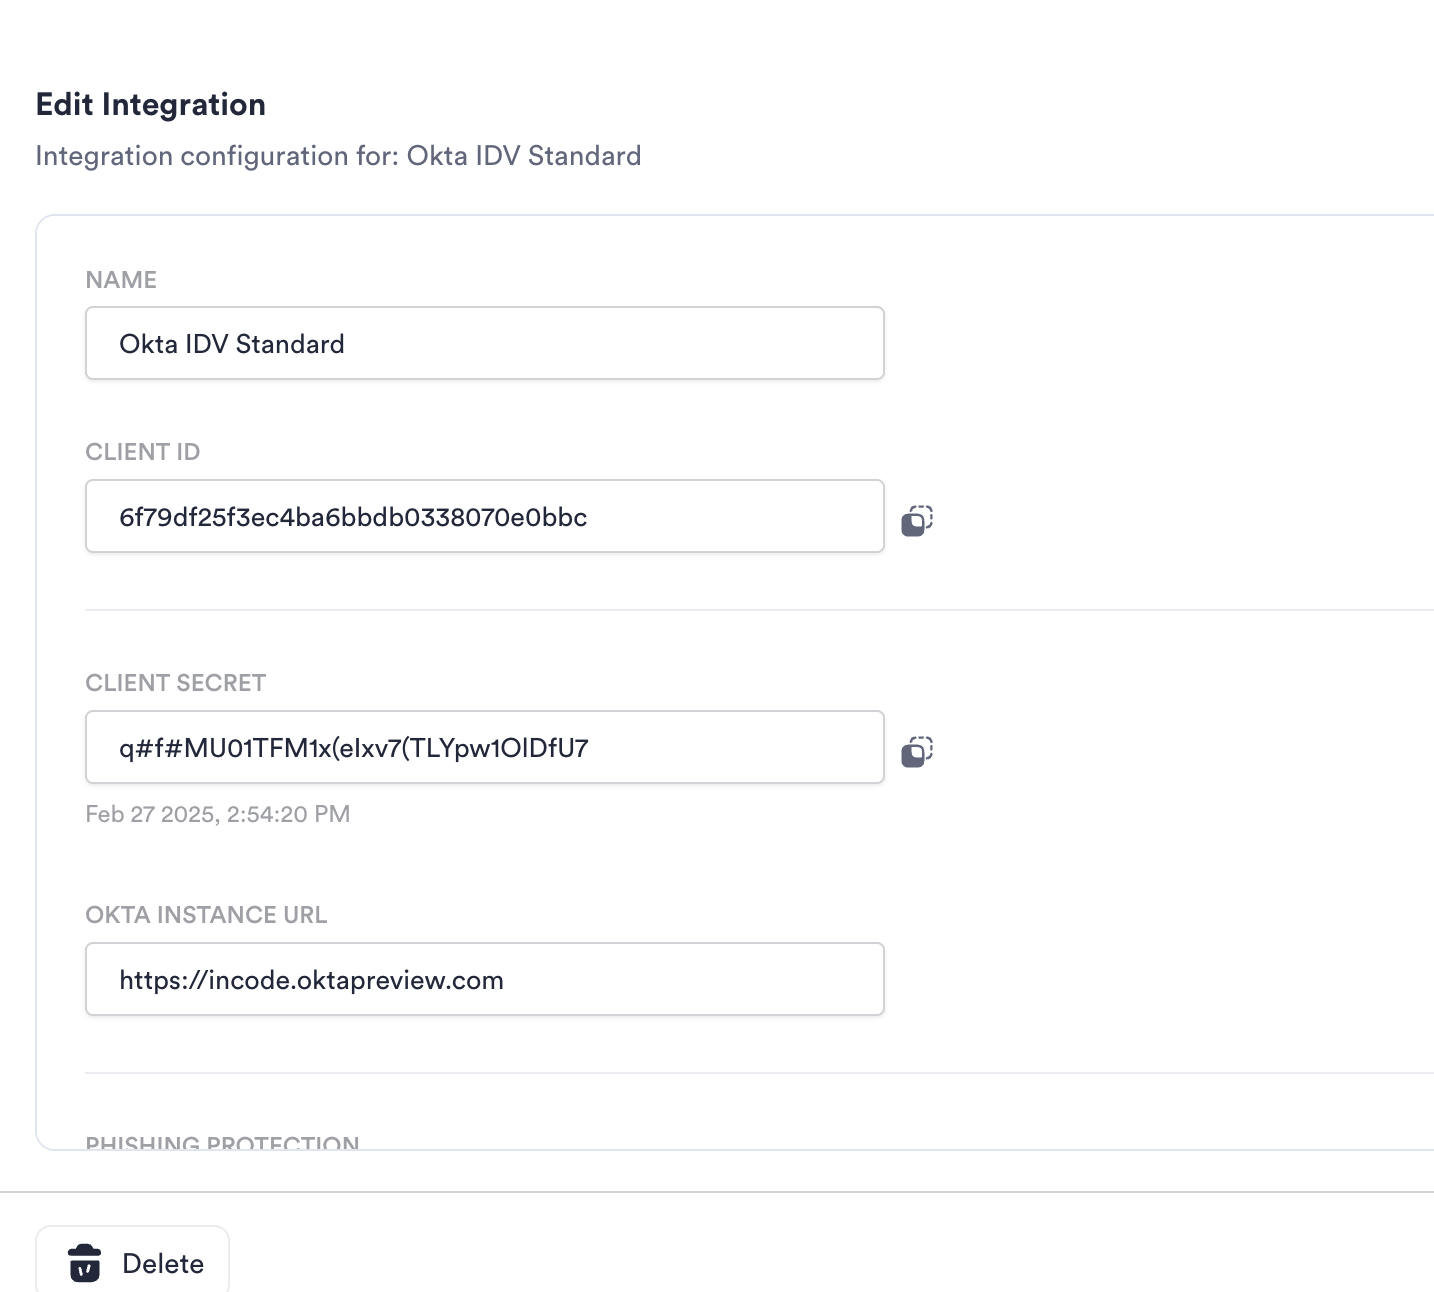
- Enter a Name for this integration.
- Select a Workflow from the drop-down for this integration.
- Enter your Okta instance URL in this format:
https://yourcompanyname.okta.com. - Copy the generated Client ID and Client Secret. These are required for the next steps.
- Click Save.
NoteThe Client Secret is shown only once. Store it securely before navigating away from this screen.
Configure Incode IDV in Okta
-
Log in to your Okta Admin Console.
-
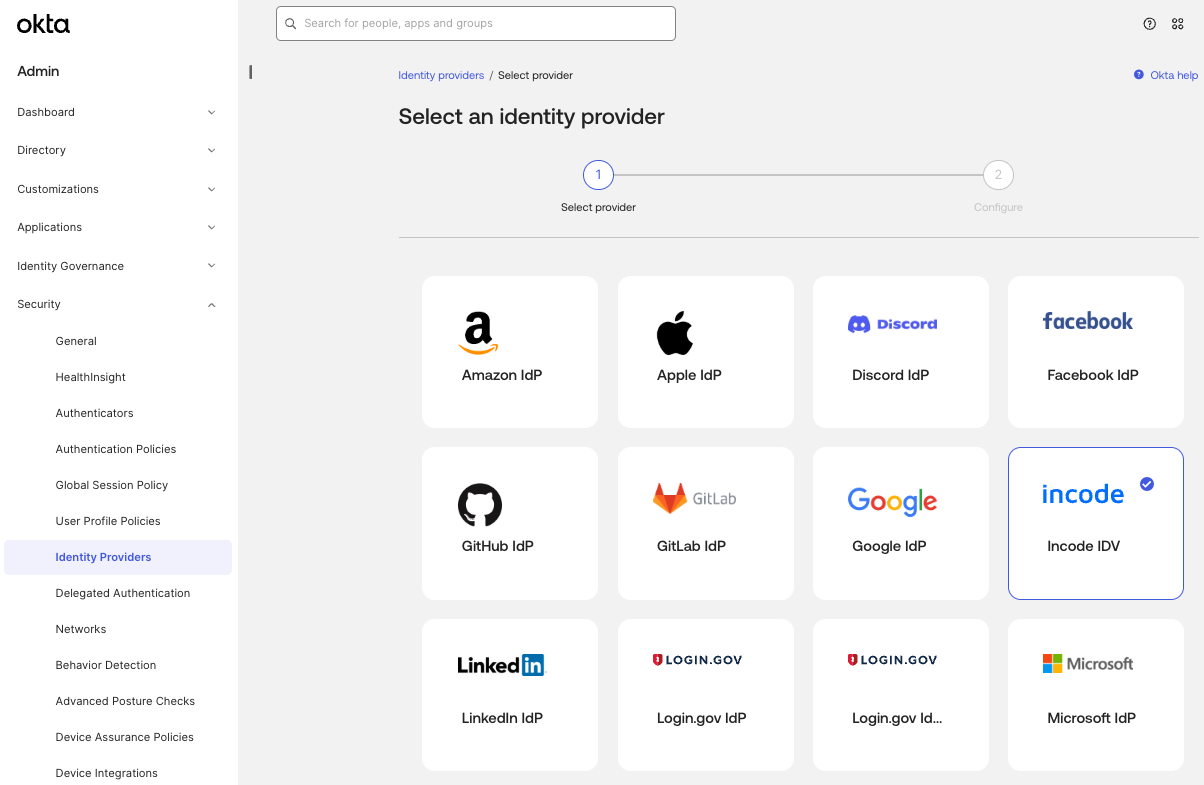
Navigate to Security > Identity Providers.
-
Click Add Identity Provider and select Incode IDV.
-
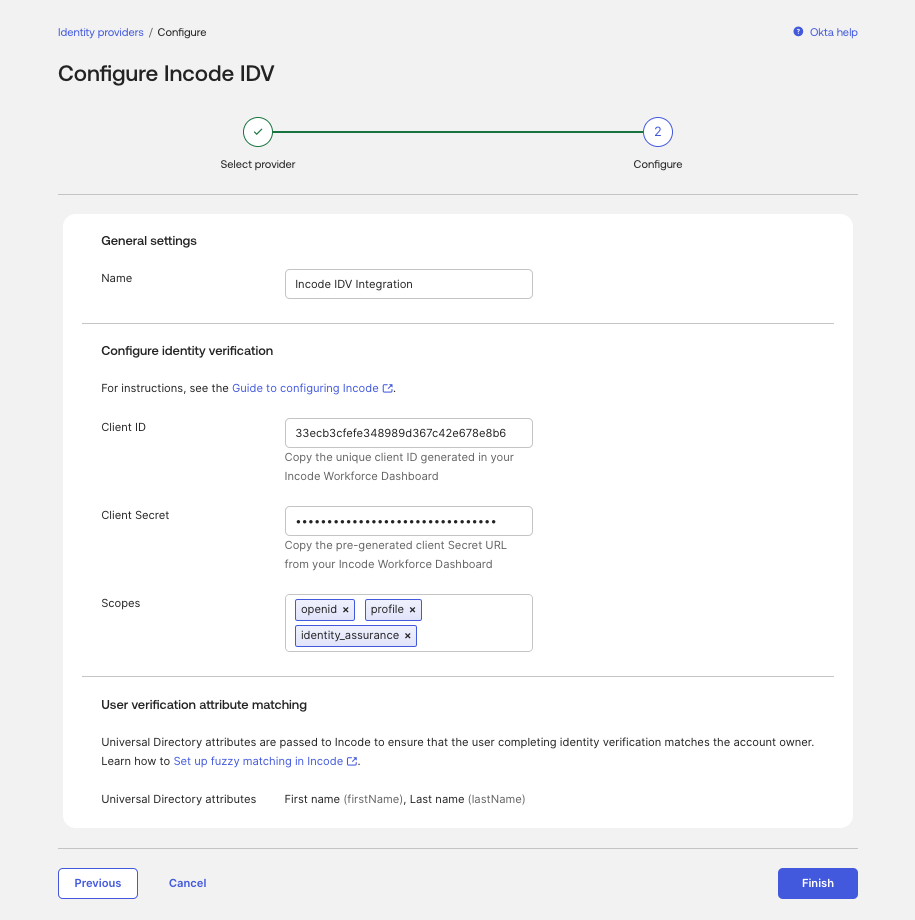
Enter a name for your integration.
-
Paste the Client ID and Client Secret copied from the previous steps.
-
Click Finish.
Updated about 1 month ago