
Conditions for Workflows
Overview of conditions and how you can use them to customize identity verification journeys
Conditions let you dynamically customize user journeys built using Workflows. They enable verification flows that adapt to the data collected during the verification process, optimizing the experience for each user.
A condition acts as a decision node. It sends the user journey down different paths based on the user data received. This lets you control which modules are presented to the user. Conditions can assess data quality, verification check outcomes, crosschecks, and more.
You configure a condition when you add it to a Workflow. For configuration instructions, refer to Configure Conditions.
Sample Condition Nodes
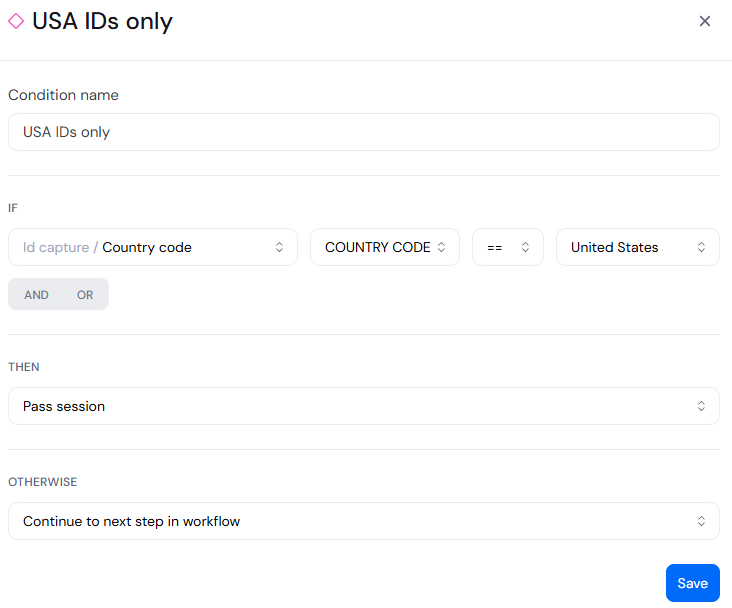
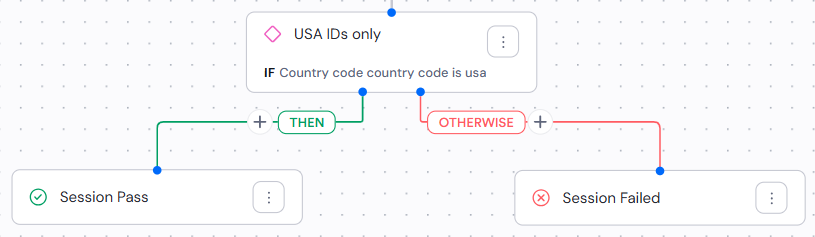
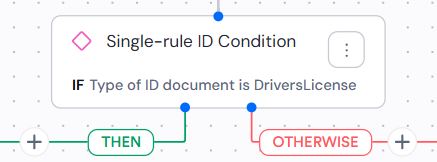
The following images show a simple condition, both in its configuration panel and as it appears on the canvas. In this case, the session passes only if the user presents a document issued by the United States:
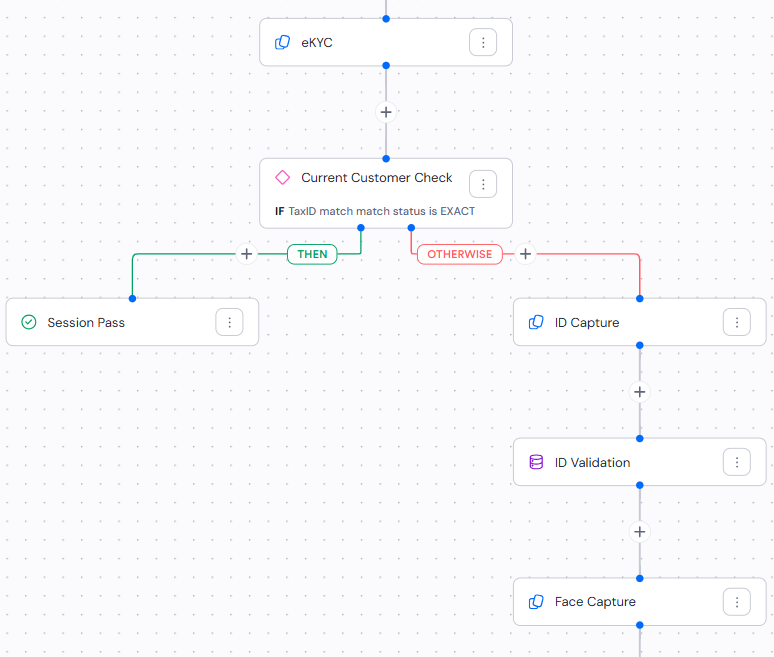
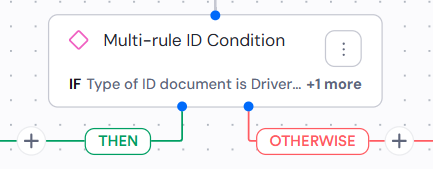
The following image shows a more complex condition. In this case, the user must complete additional steps if their identity cannot be verified using eKYC:
Best Practices
- Keep conditions simple. Instead of creating one complex condition, link multiple simpler conditions in sequence. This makes the Workflow easier to understand and manage, and it makes it easier to see which path the user journey followed.
- Use logical operators deliberately. When you do need
ANDorORto combine rules within a single condition, plan the full expression before adding it to your Workflow so it behaves the way you expect. - Monitor and adjust. Regularly review the performance of your Workflows and adjust conditions based on real outcomes.
- Plan for all outcomes. Ensure every possible path through the Workflow leads to a clear result. Dead ends can confuse users and disrupt the verification process.
Configure Conditions
Conditions act as decision nodes that dynamically route users down different paths based on data collected during verification. You can use them to control which modules each user encounters.
NoteYou configure a condition when you add it to a Workflow. This task assumes you are already building a Workflow.
The modules, operators, and values available in a condition depend on which modules are in your Workflow.
- From the Workflow builder menu, click Conditions. Drag the condition node onto the canvas.
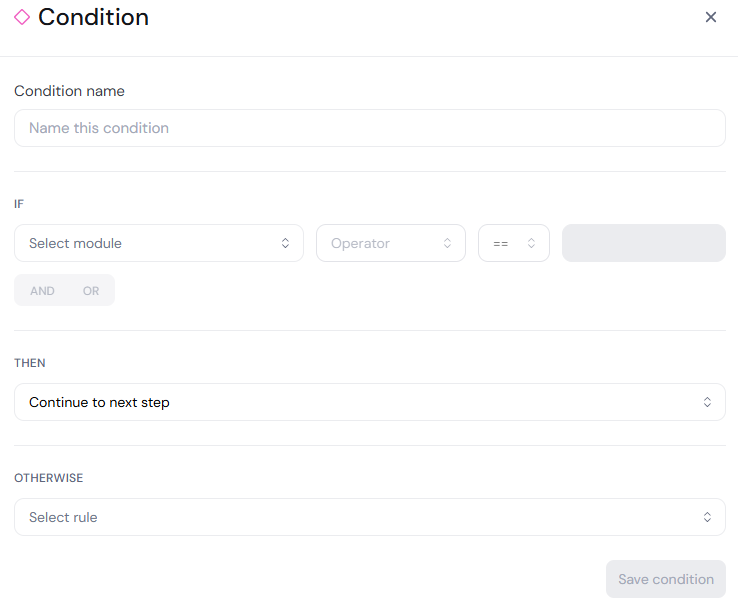
- In the Condition panel, you can enter Condition name. The name appears on the condition node in the canvas.
- Under IF, define the expression that the condition evaluates:
- Use the Select module drop-down to select the data the condition is based on. Options are organized by the module the data comes from, and you can search or filter by module.
- Use the Operator drop-down to select an operator.
- Use the next drop-down to choose how the value should be compared, such as equals, does not equal, greater than, or less than.
- Use the next field to set the value for the expression. This field may be a drop-down or a text box, depending on the operator you selected.
- To add more rules to the condition:
- Click AND if all rules must be met.
- Click OR if any one rule must be met.
- Under THEN, select what happens when the expression evaluates to true. Options are:
- Continue to next step
- Pass session
- Fail session
- Warn session
- Manual review session
- Under OTHERWISE, select what happens when the expression evaluates to false. The options are the same as for THEN.
- Click Save condition.
Conditions on the canvas
The condition node displays the IF expression beneath its name, and the THEN and OTHERWISE paths branch to the outcomes you selected:
If the condition has multiple rules, the node shows the first rule with a +n more indicator. Hover over the node to see the full expression.
You can add more modules, processes, or conditions along either path to extend the user journey.
Updated 10 days ago